Monday, May 6, 2013

Cascading Mother's Day Card

Hello! Sorry that I have been MIA in what seems like forever, but I've been around just not posting. We have been super busy trying to get our house ready to put on the market. It is taking longer than expected and I think we are going to have to have a gigantic garage sale soon. How on earth have we collected sooo much stuff is beyond me. Every year we take two or three truck loads to Goodwill or Salvation Army so why do we still have all this stuff?

Any way I do have a card to share with you on this glorious Monday! It has finally reached the 80's here in the PNW. Yeah!
I made this for my mother for Mother's Day. I picked up a copy of CardMaker (Spring2013) about a month ago. It was the cover that caught my eye with a picture of what they call Cascading Card and they even had a tutorial to go with it.
Pretty isn't it!

Here is how mine turned out:

Theirs was a birthday card but I thought it would also make a very nice Mother's Day card.
I loved the colors and just added a bit of orange. I didn't have the right spellbinders die for the front of the card so instead I  cut a rectangle, rounded the corners then ran it through the Cuttlebug with the Swiss dot folder. I then ran the inking tool over the raised dots with Walnut distress ink. I stamped "Happy Mother's Day on a scrap piece of cardstock from Linen Closet (one of my favs from DCWV.). The chipboard bird is so sweet. I just inked the edges of the chipboard bird with Walnut Stain distress ink and colored a white pearl black for the birds eye. I adhered the bird with a pop up dot. The big blue flowers are from Creative Memories and I inked the edges, again using the Walnut Stain distress ink. I then added the smaller orange flowers and added a big pearl to the centers of the orange flowers. The leaf die is from Sizzix.
The next two levels of the card I just repeated the flowers and leaf branch except I added a Martha Stewart punched butterfly to the last level. Then at the top I again used another scrap of Linen Closet cardstock to stamp "Mom" and added a flower. I did have the right Spellbinders die for the back piece and I also inked the edges of it with the Walnut Stain ink.

I am wishing all of you mom's out there an early Happy Mother's Day as I probably won't be able to make a post until after Mother's Day.


Wednesday, April 10, 2013

New Way To Organize My Dies By ArtBin

I was in JoAnn's a few days ago and they had a great sale on what is called an Artbin container that has magnetic sheets to store your dies on. I had seen this before and thought it would be great to have but the price of the magnetic sheets and container stopped me. But with 50% off I couldn't pass up the offer.
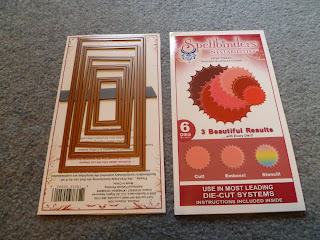
This is how I stored my Spellbinder dies before:
 I just added a magnet strip to the packaging and stored them in a drawer in my desk. It was handy but some times the dies would fall off while digging around in the drawer. Otherwise they stayed on pretty well.
Now here they are stored on the magnetic sheet:
These sheets are really strong and hold the dies securely even when you turn them upside down and shake it hard.
The box comes with three magnetic sheets. I'm not sure how many sheets with dies it will hold but so far I need three more sets of three.
 Here is the box with two sets of magnet sheets full of dies. You can see there is till a lot of room in the box.
I'm really liking this way of storage for my dies so I need to hurry back to JoAnn's to get a few more sets of the magnet sheet while they are still on sale.
I am desperately trying to reorganize my craft room. It is a daunting task but much needed.
Have a wonderful crafty week!
Teresa

Wednesday, April 3, 2013

A Beautiful Spring Day

The sun came out today and warmed the earth at least here and I hope it shone down on you too.
So instead of wanting to curl up by the fire I felt like being outside and getting stuff done. Walked the dog twice today and enjoyed the sweet smells of spring flowers.
I also finished getting the last few things out of the trailer and then cleaned it from front to back so it is now neat and clean again. I wish I could clean our house as quick as the trailer. Now that would be so nice!
It was amazing how much stuff (meaning mostly papers from our travels and accumulation of mail) during the last five months of traveling and living in it.
I thought I would share some photos of the inside our little "vacation home"
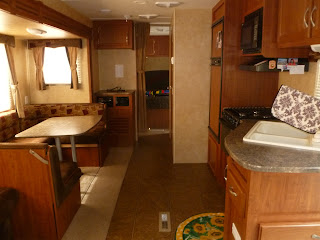
 This is looking from the bedroom to the kitchen and living area. We love the chairs in the back with the big window. Those chairs really make it feel homey and comfortable.
 This view is from the front door. The sofa and table are on the slide out.
 This view is from where the chairs are looking to the back where the bedroom is. I brought  some of my cardmaking supplies with me but I only pulled it out a couple of times. I only had the table space to work on and I used the little bit of counter space by the kitchen sink for my Cuttlebug. I just wasn't inspired to create in such a small space.
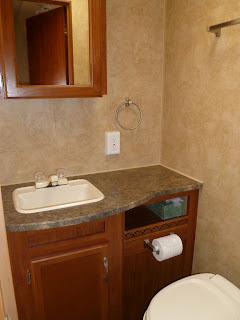
 This is the bathroom and...
 ...shower. The bathroom is tiny but I don't mind that since it has everything you need.
 This is the bedroom. After living in the trailer for a long period of time we now know a bigger bedroom  would be nice. It would be great to have a slide out in the bedroom so we could actually have a closet and a place for our shoes.
 I also need more counter space in the kitchen. Having an island would be a great way to fix that.
 I got pretty good using the oven. It is so easy to clean with it being so small.
 Here is the living area after the slide out is put in. It makes a huge difference in the amount of living space.
Hope you enjoyed the tour of our little home on wheels.
My husband just told me that the rain is coming tomorrow so I think it will be a good day to go grocery shopping and run a few errands.

Tuesday, April 2, 2013

Home Sweet Home?

We left the warm sunny south and made our way north to home. The closer we got to home the more anxious I was to get there.
As soon as we flung open the front door the house we were greeted with cold air. Forty six degrees to be exact. We turned the thermostat up and heard the furnace kick on then got to unpacking the truck and trailer straight away. After about on hour or so it still felt cold in the house so I turned up the heat some more and went to the nearest register to feel if the air was warm. Nope, the furnace was just putting out cold air. Now this was after we had spent $500.00 putting in a new motor this winter. So this was a shock since we thought all was well with the furnace.
And that wasn't all that was wrong. After Wayne filled up our hot water heater with water and lit the pilot light the water did not get hot. By then I felt like jumping right back in the trailer and heading back south. After a day without hot water we did get it going the next day. There was a switch that Wayne couldn't find but after he found it and turned the switch on we had hot water.
Now the furnace is taking a bit more time. Of course they don't work on Sat. so we had to wait until Monday for anyone to come out and take a look at it. So after an hour or so they thought it was another part it needed so he went back to the shop and was gone for hours. I guess they were having a hard time finding the right part (our furnace is over 25 yrs old). Finally they thought they had found a part that would work but after spending several more hours they decided it wouldn't work. Now our furnace was torn apart and it would be another night without heat.
I am soooo thankful for our wood stove! It can keep our house pretty toasty and thankfully it's not the dead of winter.
Well the owner of the heating company came out himself today to take a look at our furnace and decided it would be best just to get a new one. Oh and the last bit of bad news is that they can't put it in until next Tuesday. Ugh!
Well enough ranting about our bad luck. I'm just thankful we at least have hot water so I can wash all of the towels, bedding and rugs from the trailer and have a hot shower.
 This is just about all of the laundry all washed and dried. I still have a rug in the dryer and the liner from the dogs bed is in the washer, then I can put it all back in the trailer and it will be ready for our next camping adventure in Aug.
This is our wonderful wood stove that is keeping us so cozy and warm right now. Really it was the only thing I missed this winter while down south. I just love to cozy up to the stove with a book and hot beverage of choice during the long winter evenings.
As soon as I am done cleaning the trailer (which, I had planned to do today but the weather is cloudy and cold so I decided to putter around the the house and finish the laundry instead) I plan on posting a few of the photos from our trip home. The trailer will have to wait one more day.
Hope everyone is having a great week!

Teresa


Saturday, March 16, 2013

One More Thank You

Happy weekend!!
For my last thank you card I used this wonderful sketch from The Deconstructed Sketches. Go here
to the Deconstructed Sketch blog to see cards from the DT for more inspiration using this sketch. You might even want to play along.
Here is my card using The deconstructed sketch #93
 The paper is from DCWV and I think I was able to use just scraps to make this card which is always a plus in my book anyway :)
The striped banner was a leftover piece from another project so I decided it would work for this card and I added the red scalloped border because the card just looked too plain.
Now I just need to get my thank you cards ready to mail.

Enjoy your weekend.

Teresa


Wednesday, March 13, 2013

A Cheery Thanks So Much


Hello! I have a very bright and cheery card to share with you today.
In my last post I mentioned that I had another card I had wanted to make but had run out of time. Well today I got around to using this Mojo Monday Sketch #284

And here is the card I came up with:
 I changed it up a bit from the sketch but it still is very similar.
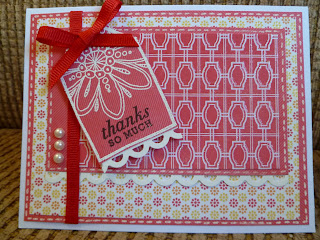
I used a stamped tag for the focal image instead of a circle. I did some white pen stitching along some of the edges and stamped the sentiment in black ink. I couldn't find a stamp to go inside the tag so I just picked an over sized flower and cut off the excess on the top and sides. I used Watermark ink and white embossing powder on the flower to match the graphic red and white raised pattern paper. I adhered the ribbon bow to the tag instead of at the top on the strip of ribbon and I used pop up dots to adhere the tag slightly askew.

Thank to all of those who have left such kind comments on my last post. They warm my heart.
Have a wonderful day!

Teresa


Tuesday, March 12, 2013

Thank You, Thank You, Thank You

Happy Tuesday everyone!

I am so excited to have something creative to share with you all once again. It has been forever since I have made a card. Although I have been crocheting a bit the last two or so days.
Any way yesterday I finally felt a creative spark and cranked out three cards. I made them all thank you cards as that is what I needed. I have found it very difficult to make any cards since I have a very tiny space to work in and a very limited amount of supplies. I will have to take a picture of my temporary space. I can't wait to get back to my craft room!!
It was kind of hard finding my creative groove again so I am not exactly happy with the out come of the cards. I guess it will take a bit of time to get my mojo going again.
For my first card I used the March sketch from A Blog Named Hero (http://ablognamedhero.blogspot.com/2013/03/march-sketch.html)
And here is my creation:
 For all three cards I used my new DCWV Cafe Mediterranean matstack.
I love the hummingbird and floral print. I used Walnut Stain distress ink on all the edges and used the Fiskar Treading Water border punch.
The heart is from an Autumn Leaves Heart and Star stamp set. I stamped the heart on pattern paper with Versa Mark Watermark ink and used clear embossing powder. I then cut it out and inked the edges before adhering it with pop up dots to the card. I forgot to add the twine so I just added a strip of pattern paper. Actually come to think of it I don't have any twine with me so I would have had to use paper anyway.

For my second card I used  sketch #201 ...

It's a pretty simple card, actually all three are pretty simple cards.
I just used a Spellbinders die and white cardstock to stamp the sentiment on and inked the edges with Firebrick Red distress ink and used popup dots to adhere it to the card.

And for my last card I used this sketch...
...from Freshly Made Sketches .

And here is my last card:
 Again another quick and simple card. By the time I finished this card I had ran out of sun and had to take these last two photos outside.
I used Spellbinder dies where I stamped two flowers (Inkadinkado- Doodle Flowers) and the the "thanks so much" sentiment (Papertrey Ink) in black ink. I popped up the sentiment in the middle of the flowers.and three layers of pattern paper.

I wanted to make a fourth card but ran out of time. Maybe I will get to it today but right now I need to get back to some house work. You know mundane things like the morning dishes, laundry and groceries.

Have a great day and thanks for visiting. Hope to hear from you again soon!

Teresa

Thursday, February 21, 2013

One Big Bad Bird

After walking the dog this morning I saw what I thought was an owl high up on the top of an electrical pole. A few nights ago there had been two owls sitting on that same pole hooting away. I wondered why an owl would be out this late in the morning. Maybe he had a bad night of hunting.

 Then it turned its head towards me and I saw it was a huge hawk of some kind. He was watching mostly in the direction of the road, probably in hopes of getting an easy meal from road kill.

 
 I had to be patient and wait for him to look my way so I could get a good photo of his face. I had to be ready and quick because he would only look my way for a few seconds then turn back towards the road.
(You might want to click on the photos so you can see a larger view)
 I don't have any idea what kind of a hawk it is but it sure made my morning walk a little bit more exciting.

Wishing everyone a wonderful day!

Teresa


Wednesday, February 20, 2013

Birthday Celebration Vegas Style

We just got back from a mini vacation in Vegas because
our daughter turned 21 and wanted to celebrate her birthday in Vegas.

Here are some of the photos of the fun time we had:

 
Instead of a cake we decided on a yummy, giant chocolate chip cookie with frosting. Thought it would travel easier than a cake and besides we wouldn't have been able to eat a whole cake in two days.

We stayed at the Riviera Hotel and Casino. It has been around since 1955 and Liberace was their first entertainer. Elvis, Sinatra and the Rat Pack are just a few of the top stars that put on shows at the Riviera.
The pool is original. Wish the picture had turned out better of the pool.

This next set of photos is inside the Wynn Hotel and Casino. It was at night so the photos are a bit darker.


I believe these beautiful hanging lanterns are also the Wynn Hotel but were taken during the day time. They were so gorgeous and unlike any lanterns from the other hotels.
The waterfall outside of the Wynn Hotel.
These next photos are of the conservatory at the Ballagio. This is always a must see when we visit Vegas. It is always decorated so beautifully.
Everything is pretty much made with flowers.

This picture frame always has something new in it and is made entirely with flowers.
These lanterns were hanging with fire crackers which had twinkling lights to look like sparks. Very awesome.
I guess it is the year of the snake. YUCK!

A couple of night photos.
At Circus Circus we watched these amazing guys do their stunts.


Here we are at the beautiful Venetian! This is another hotel that we love to visit and wander through the Canal shops.


Amber wanted to eat at the Irish Pub in New York, New York.
We had Shepherds Pie and...
Chicken pot pie. Both were served in these cast iron pots with handles. Sooo delicious!
The waitress was so nice and when she found out it was Amber's 21st birthday she gave her a shot (can't remember what was in it except for the Bailey's and Cream which you can see on top). Guess it was pretty good.
Here is Amber with her winnings. She was lucky this time and came away with money in her pocket. We were laughing at ourselves when we found us getting so excited when we would win a just a few bucks!!
We saw the show KA at MGM Grand and then the last night we just stayed at the Riviera and went to their comedy show where laughed our heads off. To finish off our last night we did a bit of gambling.