Saturday, September 24, 2011

From Our Hearts

I want to share what our small group of ladies did this week. The six of us got together on Tuesday morning and made cards for our troops for a non-profit organization called From Our Hearts.
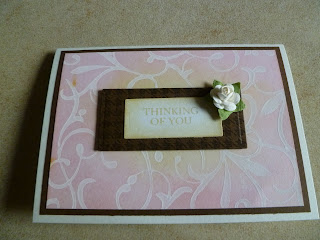
Here are some of the cards we made:


We had a wonderful time stamping, cutting and putting cards together We only made 20 some cards that morning but we kept on making cards on our own at home and at the end of the week Jennie and I had collected 80 cards.

For each we card we made we put it with an envelope and put both in a clear envelope and inserted a slip with our name and From Our Hearts information so that when a soldier picks a card they will know where they came from.


 We made Thanksgiving, Christmas, Hanukka, birthday, hello, thinking of you, just because and thank you cards. We separated the cards in groups by the type of card and filled out an inventory sheet  so when From Our Hearts receives the box they know how many of each type of card as well as the total.


We also put in packs of pens to send along with the cards so when the soldiers want to send a card they will also have a pen to write their message.

Once the cards reach From Our Hearts they regroup the cards so each box they send has a good selection of different types of cards before sending the cards on to our troops that are overseas and far away from there families and friends. I encourage you to visit their website to read what all these ladies do for our troops. If your are interested in making and sending cards go to the right side bar of their website under FAQ to learn more and to answer any questions you might have.


These photos are just a small sample of the cards we sent. We are planning on doing this again the first part of December to send Valentine cards to the troops as well as everyday cards. So if you live in the Silverdale, WA area and would like to make some cards for the troops with us please leave a comment with your email address and I will give you more information.  Or you can go to From Our Hearts website and send them directly to them. It doesn't matter if you have never made cards just come and we will have some thing for you to do. We would like to make 100 cards next time.


Friday, September 23, 2011

Finished Canvas!

I just finished my canvas for Inspiration Showcase! Well almost I just need to adhere everything down. We are moving our son into an apartment today and it will be too late to post it tonight so I am just putting the photo of the canvas up and will come back later tonight to add a bit more.


Sunday, September 18, 2011

Day 4 of Inspiration Showcase Tags

I loved day 4! Although I did not have a tag die cut nor did my tag punch work (the acetate was too thick) I did have Spellbinder Nestabilitie shapes. I found out that the thicker acetate embossed much better than the thinner. I actually ended up using the packaging that my Papertrey Ink stamps come in.
I think I am going to have a hard time giving these tags away. They are just so pretty to look at.


 I was able to use lots of old stuff on my tags and that always makes me happy. The paper is an old set of CM  paper which I used a lot but still have several sheets left. I kind of did things my own way and I am thrilled how they turned out.


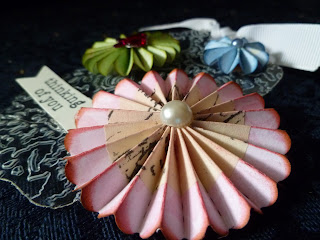
I also found out on the rosettes if you make it shorter you will have fewer "petals" making them farther apart. If you make the width narrower or wider that changes the width of the flower.


I liked the results of using a hole punch on every other scallop. It takes a little more time but adds more interest. I used vanilla cardstock to back the acetate and a ribbon that matched the cardstock. I really like the shape of this tag.


Jennifer also had us use a narrow strip on one end of the rosettes and also some of the metal tape. The metal tape is one of the few things I actually purchased for this class. It really makes a classy rosette. Like Jennifer I have had vellum paper sitting around and I just never take the time to use even though I love the look it creates. So it was fun using vellum with an embossing folder then backing it with the acetate to provide support.


I inked the edges of the banner and rosette with Dusty Concord distress ink. It was my first time using it. I love purple but just don't seem to use it much in my card making or scrapbooking.


The banner die cut I used are from Papertrey Ink and I had cut a bunch out of white cardstock just to have on hand so all I had to do was trim it down to the size I needed, stamp and ink the edges for a quick sentiment


For this tag I used a Tim Holtz embossing folder to emboss the acetate and I chose to use the tape on the pink flower (another item I purchased for the class) and I really love how it gave a vintage, distressed look to the rosette. I think the tape will be an item I will be using quite often now.


If you notice the blue rosette is one that I made shorter so it's "petals" a farther apart. I used different colored pearl centers on each rosette and one is a butterfly.


I can't wait to go to the gallery and see what tags my classmates have created! You are all so talented and creative.

Wednesday, September 14, 2011

Day 3 Dry Embossing

Day 3 Row two: I finished the second row of techniques today. This time dry embossing was the main technique.


The first butterfly looks like leather and the small butterfly has three layers. I love that I was able to use some leftover book pages that I had saved.  

On this butterfly I was again able to use up some plastic packaging that I had been saving but had no idea on what I was really going to use it on till today. I punched the butterfly shape then ran it through my cuttlebug in an embossing folder. It turned out gorgeous. I  made my flower different from Jennifer's. I first used a purchased white paper flower but didn't like the way it turned out and it was really a bit too big for the butterfly. So I found a smaller flower punch and punched out a flower from white cardstock embossed and inked it up with barn door distress ink. Then I misted it with perfect pearls and water mix.

 Next is the rosette. It is easy if you have the Tim Holtz die. After it was made I inked the edges. I like how Jennifer had us also ink the fold lines. I had never thought to do that and I really love the look. For the middle Jennifer used Sticky Back Canvas. I don't have Sticky Back Canvas so I just used regular canvas that I had leftover from making the kids something years ago. I ran it through my cuttlebug in an embossing folder and it worked great. Then I just applied distress ink with the blending tool and glued it on.
 For butterfly #4 I learned a neat trick from Jennifer. To easily center the small butterfly in the middle I did what Jennifer showed us. She used Eclips Masking tape but again it was something I didn't have but she also said sticky notes would work. I have tons of them so I punched the small butterfly from the sticky note and placed it exactly where I wanted it to be then lined up the punch with the sticky note and punched and had a perfectly punched butterfly.


For the last butterfly the Faux Letterpress Technique was used.I'm not going to lie I had problems with this one. I did it five or six times and always ended up with ink were it wasn't suppose to be. I didn't have the ink Jennifer used but I'm sure distress ink works too. So you can see bits of ink on the raised part. But I loved the Embossed Metal Technique. Again I didn't have Metal Foil Tape but Jennifer gave us several other products to use. I decided to use some old CM silver metallic paper. It worked great. I punched the silver paper with the butterfly punch and ran it through the cuttlebug in an embossing folder. It really came out looking great. 

 I am ready for the next row of techniques! I hope everyone else is having a fun time with the class too.


Tuesday, September 13, 2011

What's Happening in My Craft Room


My craft room is a disaster but I am so excited about what I am doing in there. I signed up for an online class called Inspiration Showcase with Jennifer McGuire and guests. Yesterday was the first day of the class. Here is what I have done so far:
 We learned five different ways of resist. Each butterfly represents  a different technique res.
 The red butterfly is one of my favorites so far.

 I really love how the green one turned out with kissing the stamps. I really don't have good stamps to do the kissing resist but it worked good enough to see how it works. I have had fun rummaging through my stash to to find stamps and inks to do each technique.
Jennifer also gave us some card samples with each technique. Here is my first card:

Jennifer has us using glossy paper. Now I have had some glossy paper sitting around for years but I never used it because it was always a pain to use. Not any more. This card was made with glossy paper and distress ink. I changed the card up a bit and I didn't have a border die so I found a CM punch, Love Struck and made a heart border instead of a butterfly border.

 Here is a close up of the border.
 I loved using paint as a resist. I think this was one of my favorite type of resist technique.

It is cloudy and raining out today it was a challenge to find a good place to take photos.
 This is the last card I made:
We were to stamp on pattern paper using resist. I really didn't have the right type of stamp but the pattern on the paper was tiny so it worked well enough.
 This is my favorite card of the three.
Looking forward to the second row of techniques tomorrow.

Thursday, September 8, 2011

Mini Chipboard Christmas Album

I just whipped this little gem up last night. I love how it turned out with such a vintage vibe thanks to the Making Memories pattern paper I used on  it.

 I decorated the front with a tag that I distressed with Vintage Photo distress ink, punched a scalloped border on the bottom and made a rosette flower with a gold pearl in the middle. Topped it all off with a gold bow. The album is held together with dark brown ribbon.
The first page has a pocket that holds two tags that have been inked and cream ribbons adorn each of the tags. The second page has a flap that where you can put photos and/journaling.

These are the middle pages. Both side have flaps that again are for photos and/or journaling. The stickers are from Creative Memories.


This is the inside of one of the flaps. This one has a pocket and  a journaling mat.

This is the last two pages. One has a flap with a pocket and the other side is a pocket.
This album is now in our etsy shop, Jenneresa.
I really had fun making this mini album and am thinking on making some more as kits to put in our etsy shop.
What theme do you think I should make up as kits besides the upcoming holidays?

Tuesday, September 6, 2011

Fall Is In The Air...

...so that means Halloween is not far off. I have been having a fun time with all of my Halloween stamps and papers for the last week or so and have decided to share some of my spooky creations .
First up are these tags made with vintage dictionary paper. These were really fun to make.


I really glitzed up the spider and web with Back Sparkle Embossing Powder and black gemstones on the web. The spider is punched out of black cardstock then I used black glitter on him. My favorite stamp is the crow or I guess it is probably a raven. It has a spooky elegance if there is such a thing.


 The haunted house is also a punch as is the ghost peeking out behind the house. I backed the house with yellow cardstock so it would through the windows and door.

So which tag is your favorite?

Here is the traditional witch flying accross the full moon. I love using the black sparkle embossing powder on the these stamps. I also used black distress ink on all the tags and the card.
On the moon I used Scattered Straw and Vintage Photo distress ink and I used Versa Mark to stamp Happy Halloween and clear embossing powder. The mat is white and  I inked it up with black soot distress ink.

Both the tags and card are in my Etsy shop, Jenneresa along with some new birthday cards. I will be adding more cards both here and my shop later this week.
Have a great week!

Monday, September 5, 2011

New Way to Make Meatloaf

I have some tips to share on how to bake meat loaf  in 45-50 min instead of 11/2 hours.

I was thumbing through one of my many recipe books and came across a recipe for Zucchini Meat Loaf. Now I wasn't interested in making meat loaf with zucchini but what did catch my eye was how they baked it and how short the bake time was.
The secret is in the shape. Instead of baking it in a loaf pan put it in a 9" deep pie plate. Bake for 35 min. Take it out and spread the topping on and return to oven and bake 10-15 min longer.
Here is the topping that I use:
1 tablespoon packed brown sugar
2 tablespoon ketchup
1/2 yellow mustard
While meat loaf is baking mix all topping ingredients in a small bowl.


To serve cut the meat loaf as you would a pie.


Another tip that I do with my meat loaf is to make it up in the morning, put it in the pie plate, cover with foil and put in the refrigerator until I'm ready to bake it. I do this if I know we are having a busy day but want a nice dinner. That way I just pop some baking potatoes and the meat loaf in the oven and we have a good dinner with little effort and not much to clean up.

I hope these tips help to get a nice hearty dinner for your family on busy days like it does for mine.  Enjoy!