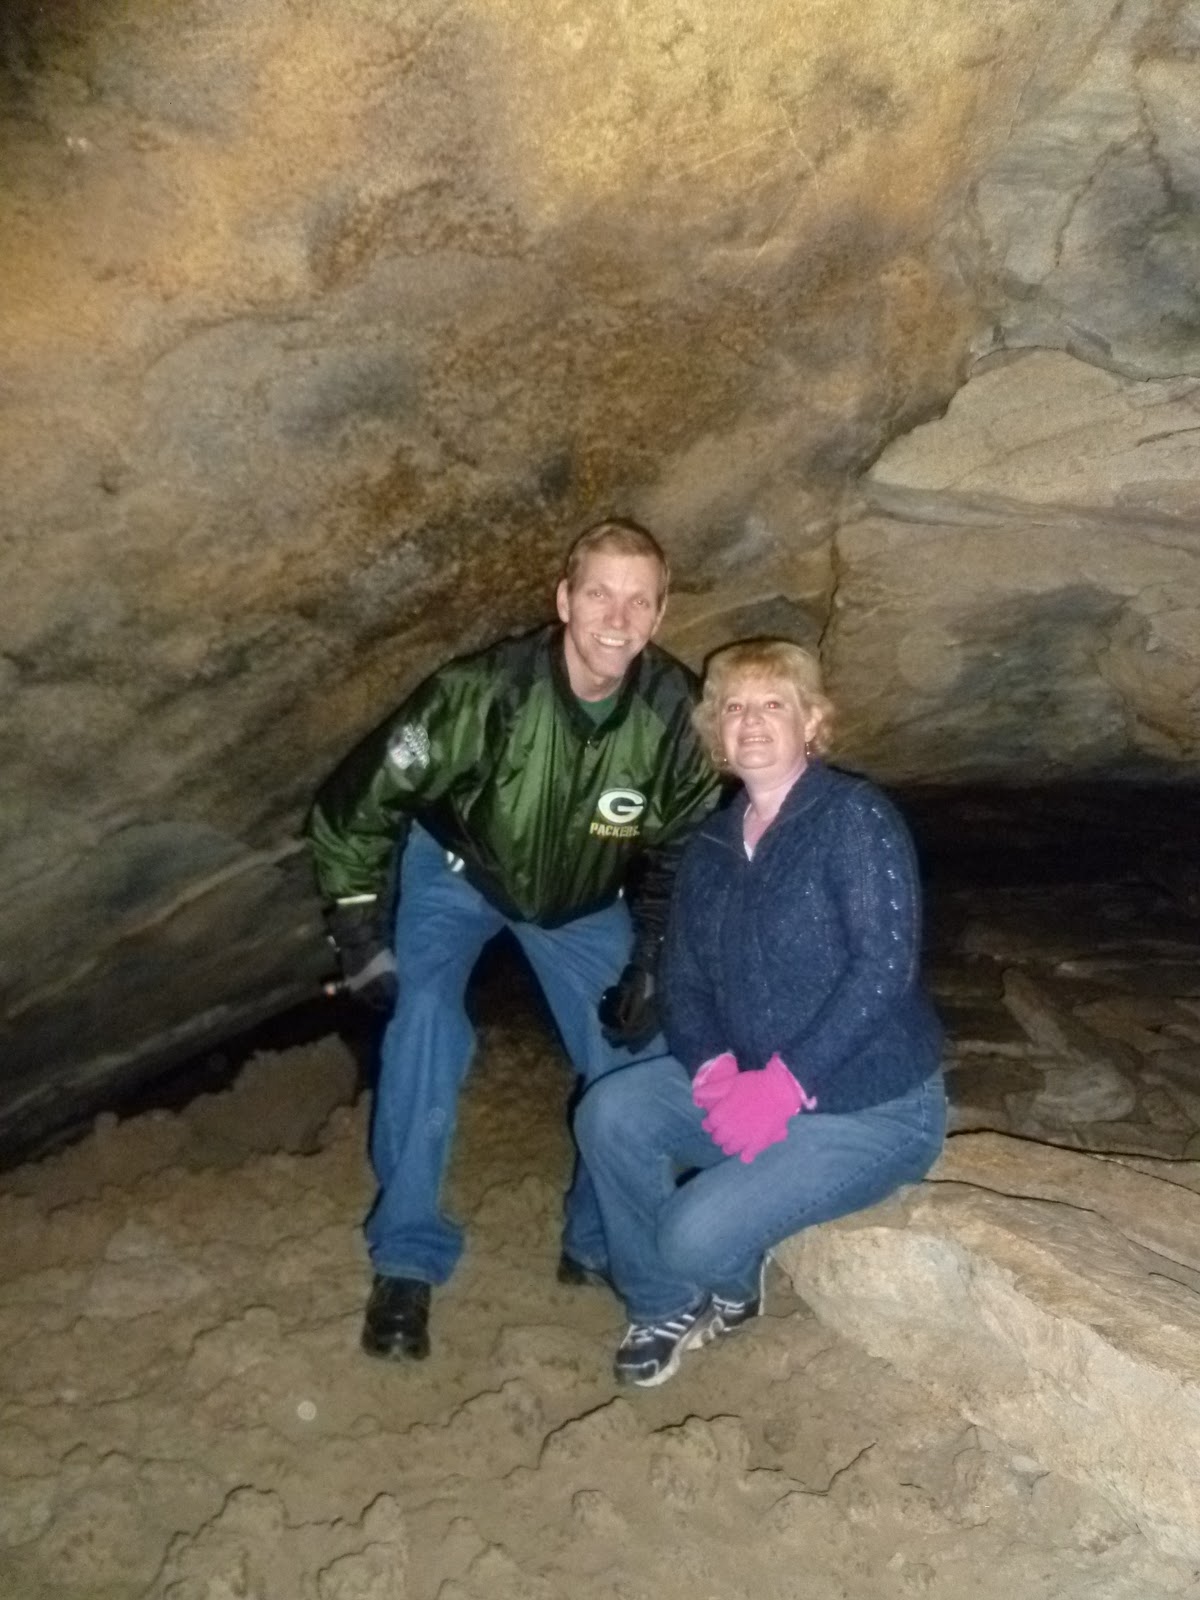
I hope everyone had a wonderful Thanksgiving. We spent ours in Arizona with friends and our daughter who is in college and had a wonderful time with them and enjoyed the sun that shined every day we were there.
Here are some of the things we saw and did while there:
Enjoy the Christmas Season
Saturday, December 3, 2011
Wednesday, November 16, 2011
Fun Time at the CK Convention!
It was another wonderful time had at the CK Convention! We arrived around 10:00 and had a little bit of time before our first class to quickly take a peek at the vendors before heading to our 11:00 class. This year we took three classes instead of two. There are so many to choose from that it is hard to decide which ones to take.
Here we are at are first class, Floral Extravaganza sponsored by Heartfelt Creations, learning how to roll the flower petals with a stylist to give them dimension.
We ate lunch and did a bit more shopping before our second class which was at 3:10. It was called Sweet Memories Acrylic Album and was sponsored by the Button Farm. I had not worked with acrylic before and thought this would be a great way to learn how to work with it. It turned out to be fun and acrylic isn't that hard to work with after all.
We saved the best class for last. It was called Mixing, Matching and Scrapping and was sponsored by Faber Castell USA & Buzz Chics, LLC. It was a mixed media class! I was a bit scared as I have not used things like gesso, gel medium,glaze, gelatos etc. But it was a blast.
We learned several different techniques and you really could do things however you wanted. We had such fun stuff to work with and were given one of everything we used in class to take home. I loved the gelatos they are so much fun to play with! They mix well with water and give a sheen to your project.
This is what we received for the class:
After the class it was almost 8:00 and we were tired. So we went to our hotel checked in, got something to eat for dinner and headed back to our room to look over what we had done in our classes and the few things we had purchased and to plan what vendors we wanted to visit in the morning. We found out that there tends to be less people shopping on Sat and plus it is easier to shop without carrying around tools for your classes which is why we take all of the classes on Friday. I think we were shopped out by 11:30 and ready to head home. Now I just have to find a place for all my new goodies.
If anyone is interested in seeing what we did any of the classes leave me a comment on which one(s) you would like to see and I will try to take photos of them and get them posted.
Thursday, November 10, 2011
Who's Going To Seattle CK Convention??
Warning! This post is a little random.
I am so excited to be going to the CK Convention again for the second time. I will be going with a friend and we are so looking forward to a Girls Weekend.
So I was just wandering if anyone from around here (Silverdale) or close by with be going too and if so are you taking any classes? We are taking three classes on Friday and the rest of the time we will be shopping!!
And because I didn't want to leave you without any pictures I thought I would share some of the beautiful fall colors I have been enjoying when I walk our dog.
This is our neighbors tree. When the sun is shining this tree glows just like the sun itself and is gorgeous.
This neighbor hood that we walk through sometimes has lots of fall colors. I have been soaking in all the beautiful sun and fall colors that I can because soon, very soon it will all be gray and gloomy for waaay too long.
And I just want to wish all our veterans a wonderful Veterans Day tomorrow and to thank all those who have served and who are serving our country now. Thank you for keeping this great nation free!
God Bless America!
I am so excited to be going to the CK Convention again for the second time. I will be going with a friend and we are so looking forward to a Girls Weekend.
So I was just wandering if anyone from around here (Silverdale) or close by with be going too and if so are you taking any classes? We are taking three classes on Friday and the rest of the time we will be shopping!!
And because I didn't want to leave you without any pictures I thought I would share some of the beautiful fall colors I have been enjoying when I walk our dog.
This is our neighbors tree. When the sun is shining this tree glows just like the sun itself and is gorgeous.
I love these vibrant red leaves too.
This neighbor hood that we walk through sometimes has lots of fall colors. I have been soaking in all the beautiful sun and fall colors that I can because soon, very soon it will all be gray and gloomy for waaay too long.
All the crisp leaves on the ground and sidewalks make the walk so much more fun. I also love the smell of the leaves and the crunch they make under your feet and to watch them gently fall from the tree and swirl their way down to the ground.
And I just want to wish all our veterans a wonderful Veterans Day tomorrow and to thank all those who have served and who are serving our country now. Thank you for keeping this great nation free!
God Bless America!
Saturday, November 5, 2011
Wine Gift Tags
I love these Wine Gift Tags. They really help to dress up any bottle of wine, champagne, sparkling cider, sports drinks or even bottles of water. As long as the neck of the bottle fits through the 1 1/2" hole of the tag it will work.
I made the base of the tag with kraft cardstock and the leaves are kraft cardstock also. I inked the leaves with Vintage Photo distress ink then spritzed them with Perfect Pearls so they shimmer.
For the sentiment I stamped it in Concord Distress ink on kraft cardstock and trimmed the one end to look like a banner then inked the edges with Vintage Photo distress ink. I adhered the sentiment banner with pop up dots and added a button tied with white floss.
Here you can see the shimmer of the Perfect Pearls.
And here too you can see how the Perfect Pearls gleams in the light.
I backed the kraft tag with purple cardstock and added a punched scalloped border at the bottom.
I will have these Wine Tags in our Etsy shop, Jenneresa soon. I have a variety of other sentiments and if you are looking for a different sentiment just let me know what you would like.
I am thinking on making some with snowflakes for winter and Christmas. With all the parties going on during the holidays it would be nice to have some of these tags on hand.
I made the base of the tag with kraft cardstock and the leaves are kraft cardstock also. I inked the leaves with Vintage Photo distress ink then spritzed them with Perfect Pearls so they shimmer.
For the sentiment I stamped it in Concord Distress ink on kraft cardstock and trimmed the one end to look like a banner then inked the edges with Vintage Photo distress ink. I adhered the sentiment banner with pop up dots and added a button tied with white floss.
Here you can see the shimmer of the Perfect Pearls.
And here too you can see how the Perfect Pearls gleams in the light.
I backed the kraft tag with purple cardstock and added a punched scalloped border at the bottom.
I am thinking on making some with snowflakes for winter and Christmas. With all the parties going on during the holidays it would be nice to have some of these tags on hand.
Thursday, November 3, 2011
Card From a Sketch
This morning as I was taking a lap around the internet I came across a sketch for a card that caught my eye. I needed a sympathy card and I knew what colors and papers I wanted to use and that I wanted to use fall leaves. So when I saw this card sketch over at Sketch Support with Allison Davis ( http://www.sketchsupport.com/2011/11/card-week-part-4.html ) I knew it would be perfect.
Here is how it turned out:
Here is a close up of the rosette and leaf:
Here is how it turned out:
Here is a close up of the rosette and leaf:
The rosette is made with Tim Holtz rosette mini die. The leaf is made from water color paper and I used three different colors of distress inks as watercolors by just pressing each of the ink pads on my craft mat and spritzing with water. I then pressed the paper in the three different colors until I was happy with they way it looked and I used a paint brush to fill in a few places. I then spritzed the paper with Perfect Pearls mixed with water. I then inked the edges of the leaf with Walnut Stain distress ink before ahereing it to the rosette.
I love the look of banners and had fun picking out the papers for them. The banners were all made from scraps from making other fall cards. I decided to go with pattern paper as a mat.
For the sentiment I chose vanilla paper that I stamped with a flourish stamp using Versa Mark ink. I then went over the paper with Antique Linen distress ink. I distressed the edges then inked them with Walnut Stain distress ink. I also used Walnut Stain to stamp the sentiment too. I used pop up dots to adhere it to the card.
I then glued the rosette onto the sentiment. I thought the card still looked like it needed a little something else so I added the jute bow in the corner and inked the outside edge of the card with Walnut Stain and called it good.
I do not like making sympathy cards so I was wondering if any of you find it hard too?
Tuesday, October 25, 2011
Too Cute to Spook Halloween Cards
First I want to apologize for the quality of the photos. It's fall and the natural light in the house is gone till spring. I live in the Pacific Northwest so it will be rare to see the sun much from now on. So I just took the photos on my desk.
I had a ball making these cards and would have made more but Halloween is almost here and I needed to get these cards on their way.
First up is the Boo to you. This is made with a 6 x6 paper pack I found in the dollar section in Target at least two or maybe three years ago. The Boo and ghost stamps are dollar stamps from Michael's.
All the paper I used is from Creative Memories. I roughed the edges of the orange circle mat with a paper distresses and inked with black distress ink. I also inked the edges of the boo sign and used a white pen for the stitches around the edges. Stamped the boo with white ink. The spider punch is a Creative Memories punch and I covered it with glue and used Onyx glitter from Martha Stewart with a black gemstone in the middle of it's body. Cut out a circle from black cardstock inked the month and date with white ink and did the stitching on the edges with the white pen. Cut out the witches hat and glued it on top of the circle. Stamped the spider web in the corner and added a scalloped strip of black cardstock on the left side.
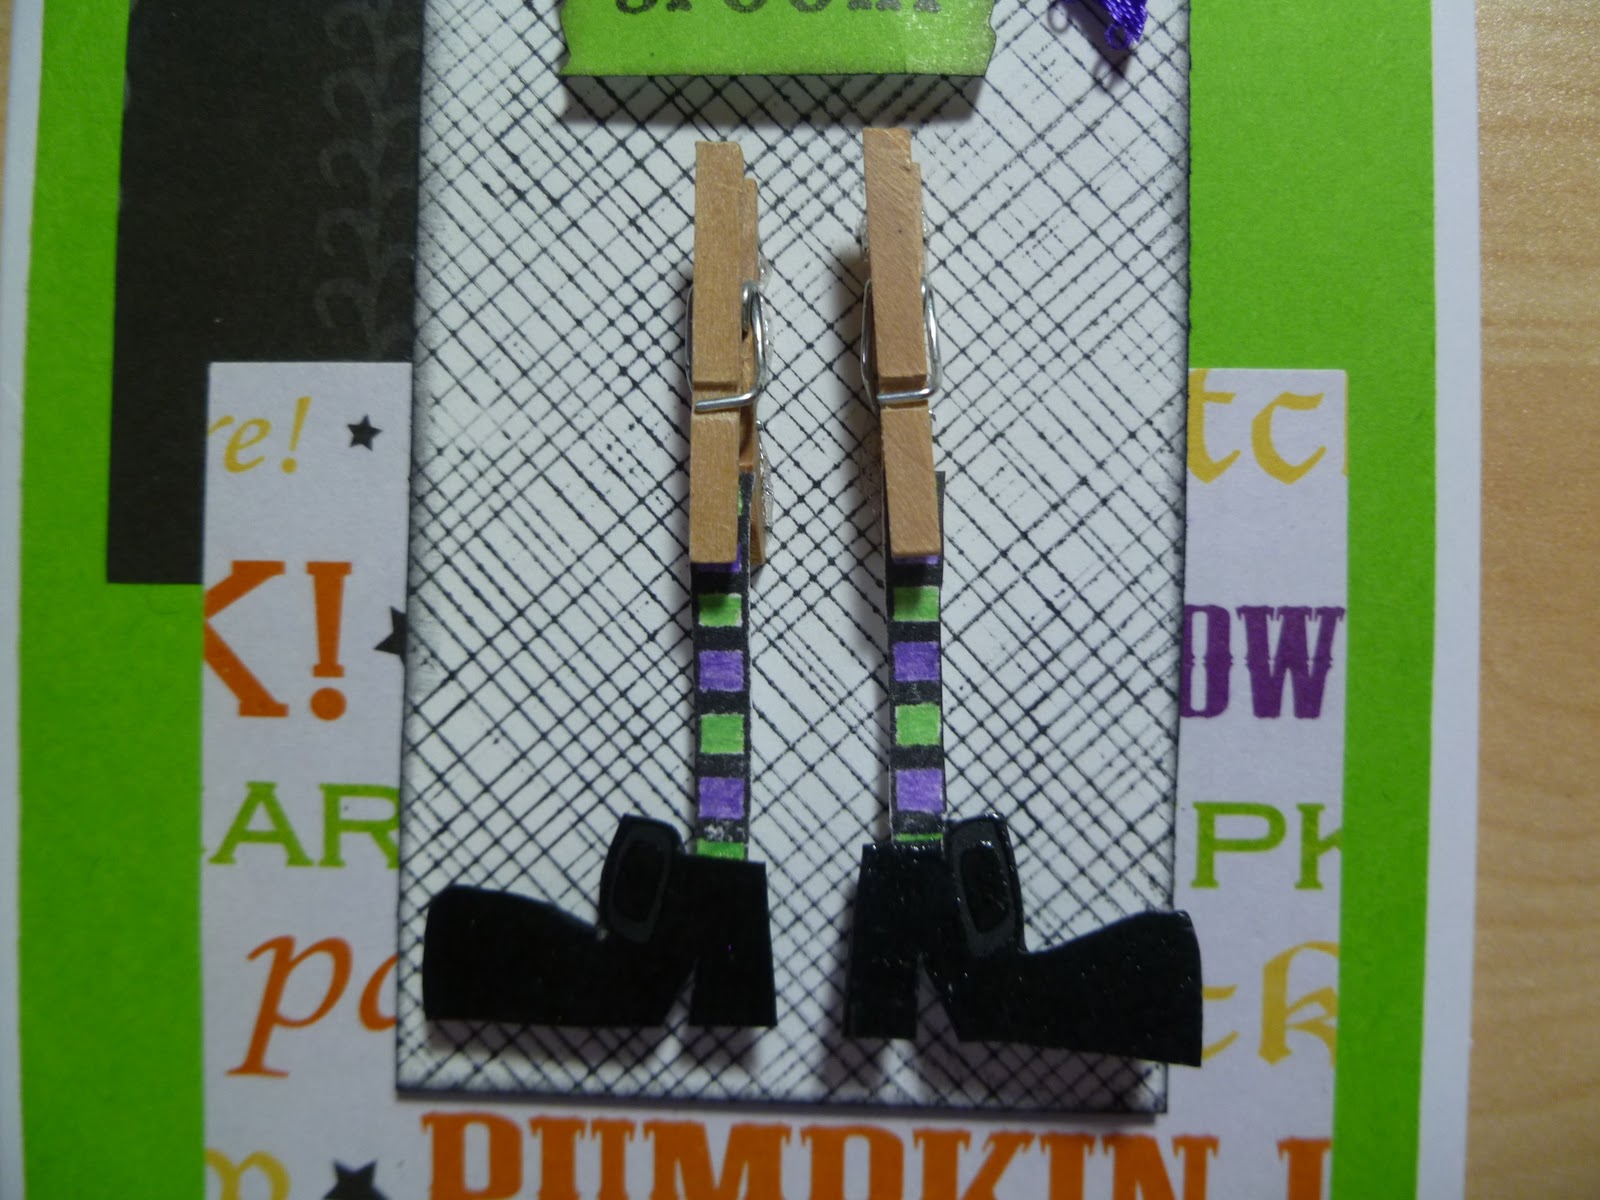
Now the idea for this card came from Michelle Bertuzzi's Spooky Boots Tag from pg 40 in the Sept/Oct issue of Paper Crafts magazine. But instead of keeping it as a tag I used it on a card.
I just love the witches shoes. They are so fun!
I stamped the tag which is made from white cardstock with the envelope stamp from Hero Arts in black ink and inked the edges. I made the shoes the same way as the card above and attached them to mini clothes pins and glued the clothes pins onto the tag and tied a purple ribbon at the top. I arranged two different sized rectangles (again the paper is from Targets $ spot) onto green cardstock and adhered the tag in the middle of the rectangles.
This was a quick and cute card. Again the paper is from the $ spot in Target. I used black cardstock as the mat for the pattern paper. I played up the spider on the paper by adding google eyes . The sentiment is stamped with black ink onto green paper and is backed with black cardstock. I added a spider punched out of black cardstock to the corner of the sentiment.
This is the last card and it is like the second card I just changed the paper and instead of a scalloped strip on the edge I used jumbo black rick rack and added the purple and orange gemstones.
Here you can see the embossed hat and the glitter on the spider. The paper on this card is all from Creative Memories.
I have one more Halloween project to share with you but I need to take the photos before I can post it.
Are you all ready for the Trick or Treaters? I am. I have the candy. I just hope I don't eat it all before Halloween!
I had a ball making these cards and would have made more but Halloween is almost here and I needed to get these cards on their way.
First up is the Boo to you. This is made with a 6 x6 paper pack I found in the dollar section in Target at least two or maybe three years ago. The Boo and ghost stamps are dollar stamps from Michael's.
The black embossed paper that the ghost is behind is sprayed with perfect pearls. I trimmed it with the wavy blade on my paper trimmer. I inked the edge of the card with Black Soot distress ink.
On the ghost I embossed it with versa mark and clear embossing powder and for fun I used some google eyes.
I can't remember where I got the idea for this card. I believe it was on someones blog but I can't find it now. I love the witches shoes and socks. It was also a dollar stamp as is the witched hat. It is a scrappy card as all the paper were from scraps. For the witches hat I used black ink on white cardstock and clear embossing powder. I used a green marker on the hat band. The shoes and socks were inked in black ink on white cardstock and embossed with clear embossing powder. I used a green and purple markers on the socks. Then cut them out.
Here you can see the embossed hat and the glitter on the spider. The paper on this card is all from Creative Memories.
I have one more Halloween project to share with you but I need to take the photos before I can post it.
Are you all ready for the Trick or Treaters? I am. I have the candy. I just hope I don't eat it all before Halloween!
Monday, October 24, 2011
Ghost Bag Toppers
I was checking my emails this morning before I started getting my daughters Halloween pkg ready to send out. I was going to fill some sandwich bags with some candy and send a couple of others for her friends. I was thinking I would like to decorate the bag with a topper but had no idea what to do.
Well it just so happened as I scrolled down my facebook page that Creative Memories had posted a cute ghost topper. When I saw it I knew that was what I was looking for.
So straight to my craft room I went and rounded up what I needed:
First I measured the width of the bag and decided how far I wanted the topper to cover the front. Then I cut three toppers out of the white cardstock with those measurements and folder each in half.
Here is all three:
Next I stapled each topper to the top of each bag. (don't worry the staples won't show)
Then for the strips of paper I just used scraps of paper and cut them the width of the topper by 1/2". I think each topper took 6 1/2" strips to cover it. And don't worry about the lengths of the strips as long as they are longer then the width of the toppers because you will just cut them all even after they are adhered.
After the strips are cut you then distress the edges with a distress tool or scissors. This part was fun! The more nicks and chunks you take out of the edges the better it looks. I also feel better about buying my distresser over a year ago and only using it a couple of times. It was so worth having it for this project alone.
Now you are ready to start gluing your strips down. I started at the top and worked down. By the last topper I figured out that the more you angled the strips the better it looked so my last topper looks the best. Angle each strip in the opposite direction from the last. Once you have the strips all adhered down trim the ends even.
All that is left is to add the google eyes. I really should have used larger eyes but these were the biggest I had on hand. I thought about running into town and seeing if I could find bigger ones but time was not on my side this morning so I went with what I had.
They didn't turn out quite the way I wanted them too but they will do and are on there way so they will be there in time for Halloween.
I was thinking it would have been nice to ink the edges of the strips with Pumice distress ink to give a little more depth to the strips but again I didn't have the time. I think they would have looked a lot cuter with larger eyes. The ones I used were 12mm if I remembered right.
Now I am off to finish decorating a pumpkin I started a week or so ago. I also have some more Halloween cards to share in my next post.
Have a wonderful fall day!
Well it just so happened as I scrolled down my facebook page that Creative Memories had posted a cute ghost topper. When I saw it I knew that was what I was looking for.
So straight to my craft room I went and rounded up what I needed:
Three sandwich baggies filled with candy, white cardstock, glue, scissors, stapler, paper trimmer and google eyes.
First I measured the width of the bag and decided how far I wanted the topper to cover the front. Then I cut three toppers out of the white cardstock with those measurements and folder each in half.
Here is all three:
Next I stapled each topper to the top of each bag. (don't worry the staples won't show)
After the strips are cut you then distress the edges with a distress tool or scissors. This part was fun! The more nicks and chunks you take out of the edges the better it looks. I also feel better about buying my distresser over a year ago and only using it a couple of times. It was so worth having it for this project alone.
Now you are ready to start gluing your strips down. I started at the top and worked down. By the last topper I figured out that the more you angled the strips the better it looked so my last topper looks the best. Angle each strip in the opposite direction from the last. Once you have the strips all adhered down trim the ends even.
All that is left is to add the google eyes. I really should have used larger eyes but these were the biggest I had on hand. I thought about running into town and seeing if I could find bigger ones but time was not on my side this morning so I went with what I had.
They didn't turn out quite the way I wanted them too but they will do and are on there way so they will be there in time for Halloween.
Now I am off to finish decorating a pumpkin I started a week or so ago. I also have some more Halloween cards to share in my next post.
Have a wonderful fall day!
Sunday, October 2, 2011
More Cards From Inspiration Showcase
Here are two more cards that I made during Inspiration Showcase and I forgot to post them.
I was pleased with the way they turned out. Especially the butterfly card. I used an edger die on the sides of the cards and really like the look. So I guess that means I need to add a few more to my die collection ;). I made the cards pretty much the Jennifer did. I stamped the butterfly and snowflake on watercolor paper and the narrow strips are also watercolor paper inked with distress ink straight from the pad.
The butterfly was stamped with Versa Mark ink and embossed with white embossing powder. Vintage Photo and Barn Door distress ink were used to paint the butterfly image by pressing each ink pad onto my craft sheet and spritzing with Pearlized water. Then I just mixed the ink and water with a paint brush and painted it onto the stamped butterfly. Let it dry then cut out.
For the strip in the middle I inked white cardstock with Vintage Photo straight from the pad. Next I inked a flourish stamp with Barn Door distress ink and misted it 3-4 times with Pearlized water then stamped it on the inked paper. It is really hard to see how it shines in the photo but in real life it is gorgeous.
Next the sentiment was stamped with Versa Mark ink and embossed with white embossing powder and added the buttons.
The snowflake card was done pretty much the same way. The middle strip was inked with Faded Jeans distress ink. I took a bunch of different snowflake stamps and put them all on a large acrylic block big enough to cover the inked strip of paper and inked with Tumbled Glass distress ink. Jennifer used Pumice Stone which I have not been able to find where I live. But I do have it now after ordering it online. Before stamping the inked snowflakes spritz with Pearlized water and stamp.
Add the sentiment embossed with white embossing powder. Next add the two narrow strips of watercolor paper after inking with Broken China distress ink.
Ink the large snowflake image with Broken China, Faded Jeans and Chipped Sapphire ( I didn't have Chipped Sapphire so I used Tumbled Glass). Mist a couple of times with Pearlized water then stamp on cardstock, let dry and cut out.
Add gems as desired. As a finishing touch I inked the edges of both cards with distress ink.
I still have several cards to make from the class. So far these are my favorites. I have everything on my canvas adhered and it's ready to hang.
Tell me what has been your favorite cards or techniques from the class?
Subscribe to:
Posts (Atom)