Thursday, March 8, 2012

Signs of Spring

I had to go outside to escape the fumes from the new counter tops that we had installed today and strolled around the yard to check on the progress of my spring flowers.
This is what I found last week:


Snow covered Crocus. I week can sure make a big difference with a little sun. Here are the same Crocus today:


They are in full bloom plus some purple ones have sprung up too along with this pretty bunch:


These are my favorite Crocus. I love how they are dark on the outside and lighter in the middle.
My Hellebores is another favorite spring plant of mine. It is also known as the Lenten Rose and blooms even before the Crocus. I would like to plant a few more Hellebores plants in different colors.


To see the photos better just click on any of the photos.


They have sooo many blooms and they last a long time.


The tulips and daffodils are coming along and the lilies are popping up through the ground so there will be more blooms to come along with the sunshine and of course the spring rains.
Happy Spring!

Tuesday, February 28, 2012

Pretty Blue Birthday Card

I made this card back in January for my mother-in-laws birthday and forgot to post it. So here it is now:

 My inspiration for this was a sketch and made only a few minor changes. I used a heart shape instead of a circle. I thought the doily was too white to go with the paper I was using (which by the way is called Linen Closet from DCWV) so I inked it with distress ink.

I die cut a heart with a spellbindes die, inked the edges and stamped the sentiment in brown ink then adhered it to the heart doily. I also inked the edges of the flower and added pearls to the center.


For the banner sentiment I just stamped it on white paper trimmed the one end into a v shape, inked the edges and tucked it under the doily a little bit. I love the papers from the Linen Closet! They are so pretty.

I have a couple of other cards that I made back in January that I will post in the next few days. We are getting ready to put in new counters in the kitchen so it may be a few days before I get around to posting them. But I will eventually get them up.

Monday, February 27, 2012

A Little Valentine Inspiration

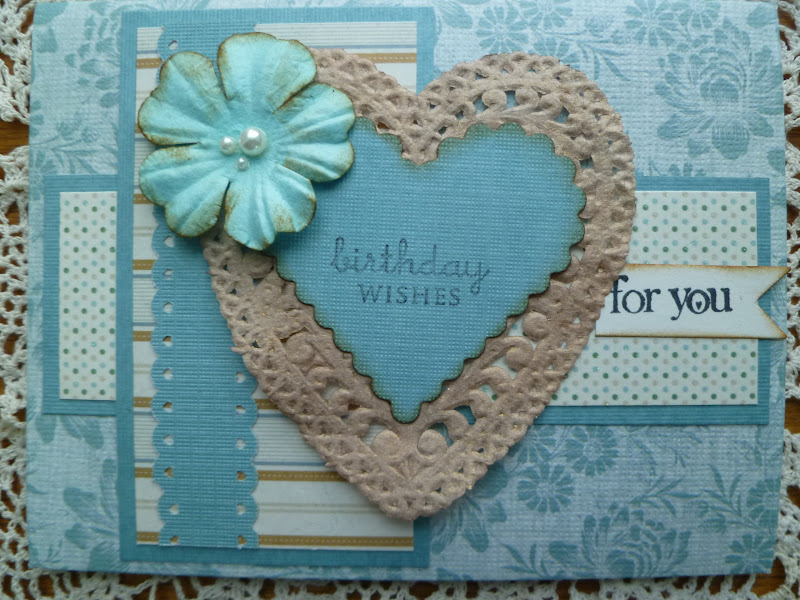
I thought I would share with you how I was inspired to make my Valentine cards this year. I am sorry I don't have a photo of the cards I made except for the one I made for my husband. Can you believe I forgot to take photos of the cards before I sealed the envelopes? I thought to myself I need to take photos before I mail them but didn't think of it again until they were sealed and ready to mail.
But... I can show you the card that inspired me just click on this link: http://stampinat6213.blogspot.com/2011/12/sweetheart-for-valentines-day.html
Although I used it as a Valentine's card I think it would make a cute thank you card. I pretty much stuck to the design but the paper colors were different. My card size was smaller so I had to make some adjustments for that too.
Now I can not only show you the inspiration I used to make the Valentine for my husband but I also have photos of the card.

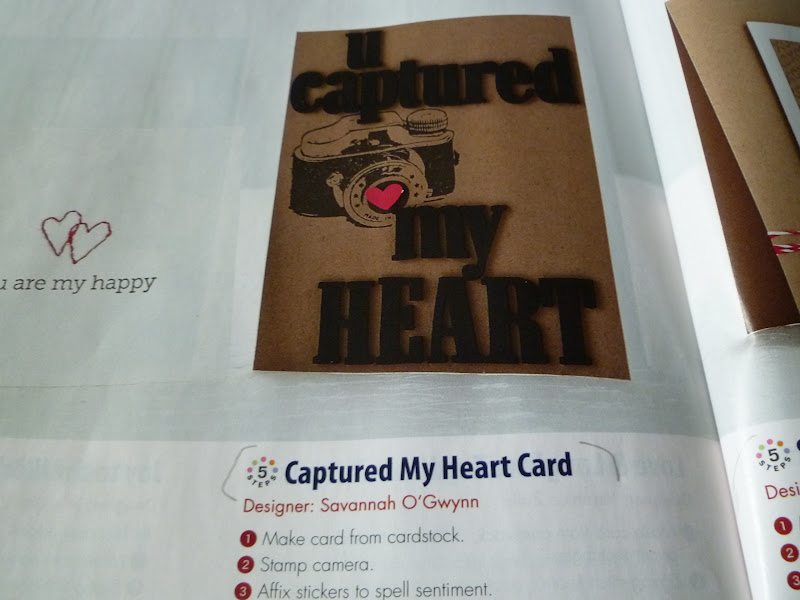
When I saw this card in the March/April issue of Papercrafts magazine I feel in love with the sentiment and thought I would make the card pretty much like the one in the magazine.


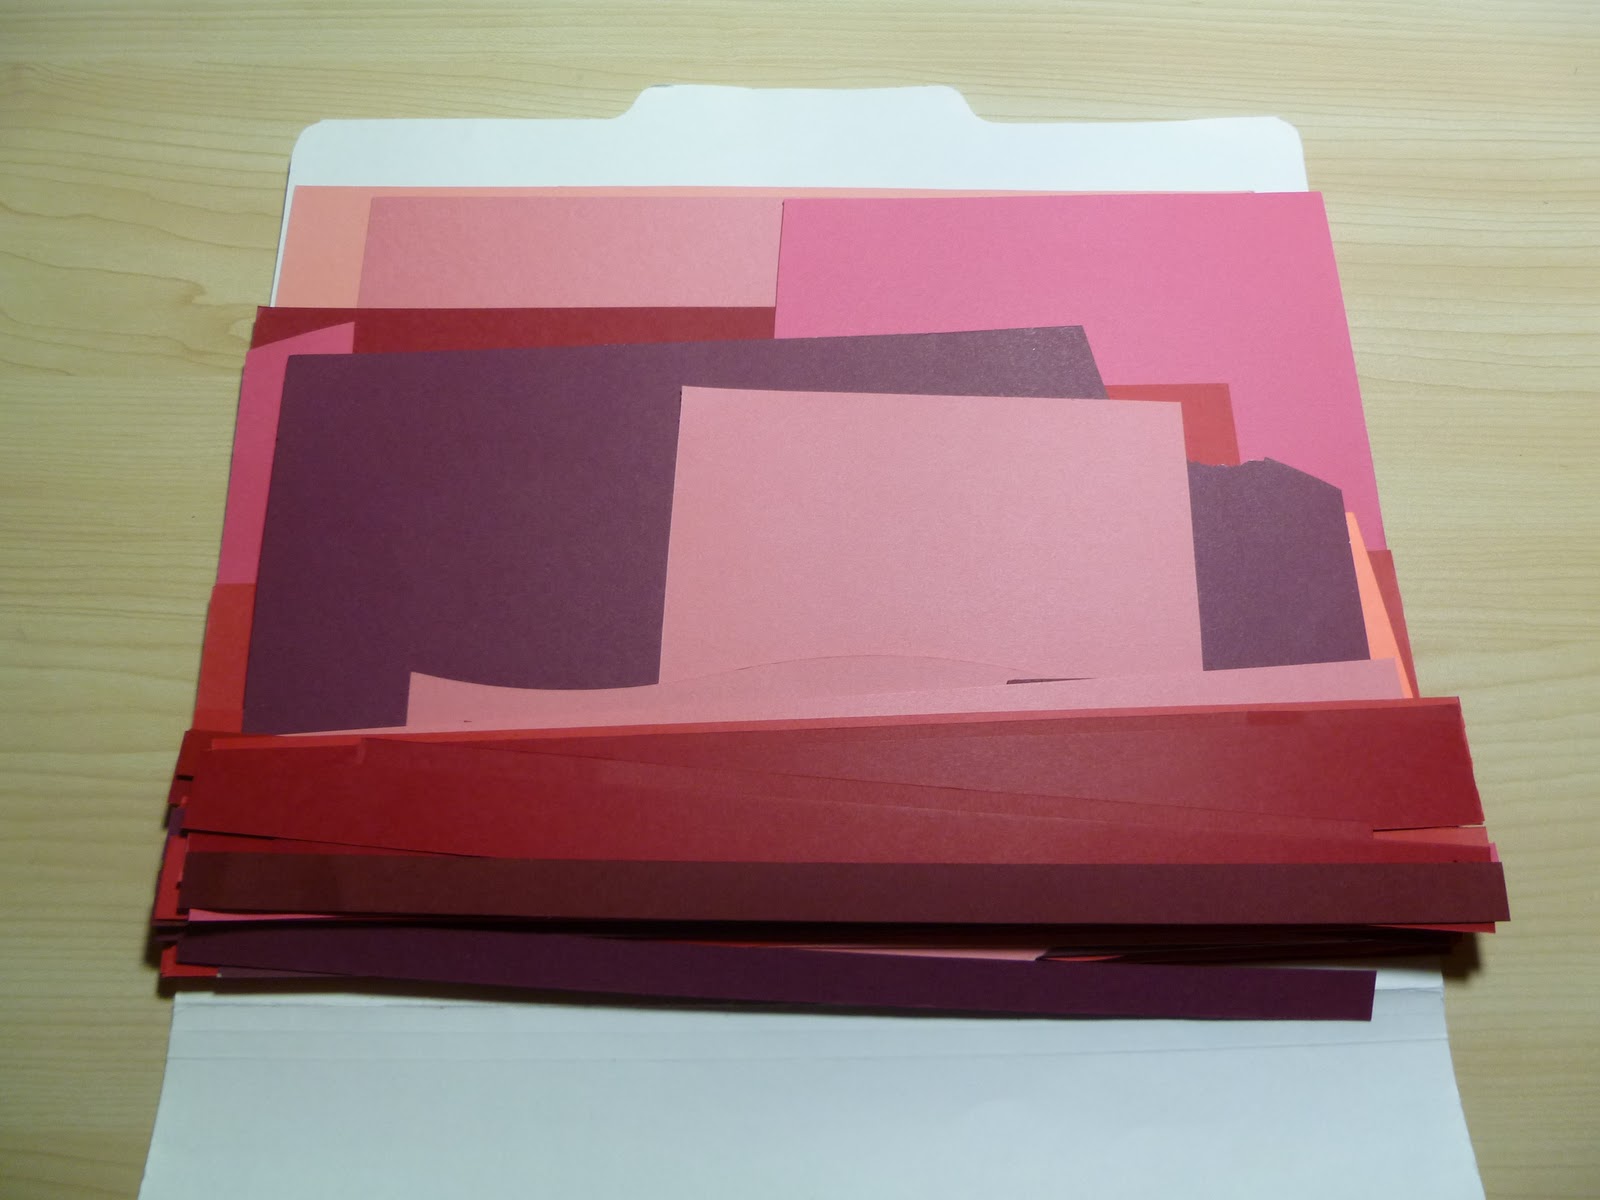
A few days ago I was shopping at Micheals and ran across some 8x8 paper packs in there $ section that I fell in love with ( of course it doesn't take much for me to fall in love with paper). There were also matching tags, jounal boxes and ribbon. I couldn't resist and thought it would make a nice Valentine card.


So now I had the sentiment and paper. For some reason  I decided I was going to use these cute little bird stamps from Hero Arts that I have had for a couple of years and have never used. Of course using the bird stamps changed the design of the card but I still could use the sentiment.

I chose the plaid paper for the background and the tag. I knew I was going to use a heart to layer the birds on and I found one I had in my scrapbox of leftovers from a previous year along with the zigzag border which fit the tag perfectly. I felt the heart was too white so I inked it with Antique Linen distress ink. For the birds I stamped them on kraft paper and cut them out and adhered them to the heart with foam dots.

I love how the birds looked on the kraft paper.


For the word "captured" I just stamped the letters in black ink on the kraft paper and cut them out and adhered them at the top of the tag. I also tied on a pink ribbon that came with the tags.


I found a white heart doily that I remembered I had stashed away and I also inked it with the Antique Linen distress ink so it blended in better with the papers I was using.
My mother had sent me a huge container of foam hearts in Dec. so I pulled one out that matched the papers and decided I would use it for the U in the sentiment. I also inked the edges with Walnut Stain distress ink.


For the last part of the sentiment I used one of the journal boxes that came with the tags and used letter stickers to spell out "My" and then I found a glittered red heart in my stash of leftovers that fit perfectly.


Once I had all the pieces made I laid them out on the card till I was pleased with how it looked then I adhered it all down to the card front and stamped the sentiment on the inside and a stamped a border on the envelope. I thought it turned out really cute.


I hope you all had a wonderful Valnetine's Day!

Saturday, January 21, 2012

New Addiction

Like I said in the post Our Second Home http://teresazuehls.blogspot.com/2012/01/our-second-home.html Jennie showed me how to crochet a bit. I thought I would share how I am coming along.
It was a bit challenging for us as she is a lefty and I'm a righty but between her,the book she had and what little I remember from watching my grandma crocheting when I was a little girl we got it figured out.

This is the piece I made while practicing:


Not a very pretty piece but it helped me learn how to control the thread tension, the hook and holding the thread till it finally felt comfortable after crocheting so many rows. Believe me it all felt so awkward that I thought I would never enjoy the craft of crocheting. Now I can't put it down. I just keep on working row after row.

Here is the dishcloth I am working on now:


Sorry the photo is a little dark. This is piece is much better. The thread tension is even and I am using a smaller hook. The first two rows I worked on before I had practiced on the white yarn and bigger hook. It was sooo hard to work with the smaller hook so Jennie had me switch to the larger hook. When I switched back to the smaller one after working on the larger hook it was much easier.


You can see the stitches are a lot more even now. It's not perfect but it's getting there.


I am almost done working the rows. Only 3/4 of an inch to go. Next I will have to learn how to finish the edges. I am excited to get this far and have so much more to learn.

Do any of you crochet? What stitches should I learn next and what would be a good next project? A scarf?

Wednesday, January 18, 2012

Our Second Home

We spent our first weekend in our new second home.
This is our view during the day.

And we had this lovely sunset in the evening.


Two days later we woke up to a totally different scenery.


It was so beautiful and peaceful with the blanket of snow covering everything.


Oh and by the way this is our new home! It has wheels so we can move it to wherever we feel like going to. This weekend it was Pacific Beach. We really didn't know it was going to snow so that was a nice surprise. We went with another couple who also had a new rig and this was our "Maiden Voyage" to try them out for a short trip not too far from home and work out any kinks before taking a longer trip.

It was also our first time taking our dog along but he did fine and he even got along great with our friends dog. We enjoyed walks along the beach during the day and in the evenings after dinner we would play games or watch movies. Jennie even taught me how to crochet.


We stayed nice and cozy inside the trailer and Nanook was so happy to be inside with us as he is an outside dog at home. He did well and learned his place was in his bed. The first night we heard his nails clicking on the floor as he made his way to our bedroom. We would tell him to go lay down and then we would hear his nails clicking all the way back to his bed. Then about an hour later he would make his way back and we would tell him to go lay down and he did. The last time he came back to the bedroom he started to whine so we figured he had to go potty. It wasn't fun getting up in the wee hours of the morning to take him to do his job but after that he slept the rest of the night. The next night he only came back once. By the third day he had the routine down.


All in all the winter trip went very well and we left before the expected nine inches of snow was to hit the coast. I call that perfect timing.


Here is one last photo of the campground covered in a dusting of snow. There were only a handful of other campers so it was pretty quiet the whole weekend.

We are excited for our next camping trip. In the mean time we have a list of things to bring or do to the trailer before our next great adventure.

Wednesday, January 11, 2012

By The Numbers

Cath always picks such great pieces for her Tuesday Triggers I am always excited for Tuesdays just to see what she picks even if I know I can't play.
 When I saw this weeks Tuesday Trigger over at the Moxie Fab World blog it immediately reminded me of a Cuttlebug embossing folder that had random numbers just like on the quilt. You can find the Tuesday Trigger here to see where my inspiration came from and what I took from it: http://www.moxiefabworld.com/2012/01/tuesday-trigger-by-numbers.html
Here is what I came up with:


I used the numbers embossing folder on white cardstock. I wanted the numbers to be colored and so I decided to use Shabby Shutters, Tumbled Glass, Broken China, Marigold, Worn Lipstick and Spun Sugar distress inks. I  took each ink pad and smeared ink onto my craft sheet. I just took a paint brush with water and mixed each color of ink as I used it and painted the embossed numbers. It took a little while to carefully paint each number but the ink really helped to make the numbers pop.


For the #50 I was going to use Papertrey Inks By the Numbers dies for the #50 but they were a bit too big so I ended up using Provo Craft font dies Olivia. For the TH I used the Martha Stewart punch. The mat for the Happy is the inside of the zero. I used black Staz On ink. 


For the border I used a scalloped border punch in pink layered with a straight green strip on top. I ran a mini rick rack down the middle of the green border and again I used the inside of the zero to stamp the text birthday except this time it was from the Papertrey Ink number die that was too big. I threaded green floss through a white button and adhered it to the sentiment. To finish the border I used some blue gemstones.


The thing that  made me happy is that I finally used the numbers embossing folder. I have had it for a year and had never used it till now. It always makes me feel good to use something I've had for a while. I might not have thought to paint the numbers different colors if it hadn't been for this weeks TT.
If you have any questions about the card just leave it in the comments. I will be happy to answer any questions you have.
Now I am off to post my card and to see what the other gals came up with.


Sunday, January 8, 2012

Bird Inspiration

One of the many blogs I read is The Classroom by Julia Stainton and I was inspired by one of her cards back in Dec. Here is the link if you would like to see hers and what I took from her creation to make mine  http://ellenhutson.typepad.com/the_classroom_new/2011/12/natural-beauty-card-by-julia-stainton.html

Here is how my card came out:


I loved Julia's chipboard bird with the doily and all the texture but I didn't have a chipboard bird. I did have some Martha Stewart bird stamps that I bought a looong time ago and have never used. This was the time to pull them out. I decided I would use distress inks to paint the bird. I chose my colors then pressed each ink pad onto my craft mat and spritzed each color lightly with water and used a paint brush to paint the bird and leaves. I sprayed it with Perfect Pearls to help blend the colors and give it a little shine. After it dried I cut it out.


After deciding on the color of the card base I decided to use a white doily so my cluster of embellishments did not fade into the background. I inked the edges with distress ink so it wasn't too white.  The corrugated paper is another thing that I have had forever but I have used. After I dye cut the label with my die and Cuttlebug I inked it with a gold ink pad that I just lightly ran across the ridges. Then I inked the edges with Walnut Distress ink.


For the blue strip I used a piece of canvas I had leftover from another project and inked it with blue distress ink by using the blending tool. I then frayed the edges and adhered it to the corrugated label.


Next I punched a label and used a script stamp with tea dye distress ink then stamped the thank you with black ink and embossed it with black sparkle embossing powder. After I punched the heart out of red cardstock I spritzed it with some of the Perfect Pears water and let it dry before adhering it to the tag. I used gold pearls in the bottom corner and inked the edges of the tag with Walnut Stain distress ink before adhering the tag to the blue canvas and corrugated label.


I love all the lovely layers of Julia's card and wanted to transfer those over to my card. I think I accomplished that. For some reason I have a hard time doing lots of layers. I get a couple of layers and then I think it's good, can't of anything else to add or I am afraid it will ruin the card so I just stop while I am ahead.  
I do like how the tag came out but I wish the bird had turned out a bit better.

I was wondering how you all come up with your card ideas. Are you usually inspired from paper, stamps, a card sketch or someones card like I was inspired by Julia's card?

Friday, January 6, 2012

New Year/New Organization

Happy New Year to all!
I thought I would share with you how I reorganized my cardstock scraps since it seems like the new year is a good time to wipe the slate clean and get a fresh start on things.

I keep my scraps of cardstock in this file. In some ways it works very well. It keeps each color separate. Say I was looking for a red scrap (I kept all shades of each color all in one folder) I would just grab the folder marked red.


But once I opened the folder it just seemed to take me a long time to find  what I was looking for especially if I was looking for a small scrap. My folders had gotten so full especially the colors that I tend to use the most that when I would go through the folder pieces would fall out and I had a hard time finding the smaller pieces as they would get lost among the larger scraps. So if I was in a hurry or just didn't want to go through the hassle of the messing with the overflowing folders I would just grab a new sheet of cardstock. Of course that was just making more scraps to go in my already full folders.


This is a photo of the folder once I had taken out all the small scraps. All that is left in the folders now are pieces of cardstock that are larger then 5"x7" or strips that are too long to fit in the with the smaller scraps.


I now am storing the scraps that are 5"x7" or smaller in this old photo container that I was no longer using.


I didn't spend any time on making it look pretty as I wanted to make sure that I was happy with the system before spending time making it look nice. I have to say I really like the system. For dividers I just cut chipboard to fit the size of the box and punched out labels of each color group and stapled it to the top of the chipboard divider. I have used it a few times now and it seems to work really well. I know if I need a piece of cardstock about the size of an A2 card or smaller to look in this box first. It is big enough to hold all the scraps and allows me enough room to browse through with ease.
Here is a top view:


Like I said it isn't pretty but I really like having the smaller scraps separated. I am finding what I want faster and using up more of my scraps this way.
I plan on sharing with you some pictures of my craft/office room It is nothing fancy but I am so happy to have a room with all my things in one place. It saves me so much time.
Do you have any organizing ideas that work well for you?


Wednesday, December 28, 2011

Scrappy Thank You Cards

Thought I would share these cards with you since it is a great way to use up some scraps.
Here are the two cards:


The card on the left is what my original idea was and the second card is made with the negative from die cutting the tree. So I ended up with two cards from one idea.


To make the tree I used a piece of scrap white paper that was bigger than the Papertrey Ink tree die but you really could use any color as you are going to cover it. Next I just raided my green scraps and I wasn't too picky about the length just as long as they were longer than the width of white paper. I cut the paper into widths of 1/4" and 1/2" but you could make them all the same width if you wanted to. Once the white paper was covered with strips of solid and pattern paper ( I used a tape runner to adhere the strips) I then just trimmed all around the edges so the strips were the even with the white paper. It is faster just to let the strips over hang and then trim instead of taking the time to cut them to the same length.


Next lay the die over the white paper with the green strips and run it through your die cutting machine. If you plan on using the negative make sure you put the die on where you want it. For mine I just made sure it was centered. I inked the edges of the tree with Vintage Photo Distress ink. When you have a lot of detail like the tree it is easier to take the pad off the inking tool and just use the pad. It gets in the nooks and crannies very well that way. I found a piece of green scrap paper the size of my card front then I tore a strip of scrap white paper and inked the torn edge with Tumbled Glass Distress Ink and adhered it with pop dots to the green paper at the bottom. Then I wrapped some metallic floss around the tree before adhering it to the card. I used pop up dots on the tree to adhere it to the green part of the card and then tape runner on the part of the tree that was on the white paper. I stamped the sentiment in black ink. Then I matted that with a dark brown cardstock and adhered it to the cardbase. Stamped the sentiment in the middle of the tree with black ink and that was it.


For the next card I simply backed the negative space that was left from the die cut tree with a scrap of green pattern paper using pop up dots to adhere it.


Oh I forgot I also inked the inside of the negative with Vintage Photo Distress ink again with just the pad.


I was able to make both cards using just scraps. I really like the card made from the negative the best and it was the afterthought.
Which one is your favorite?

You could do the same with a flower or butterfly die or just about any die you would like.