Thursday, April 19, 2012

A Day to Celebrate!

Today's post will be short. First card is made off of Mojo Monday sketch 237:

Very cute and easy sketch to use and here is how my card turned out:
No fancy techniques just a little ink and white embossing powder. It's kind of a fun card for the 4th. 

 I spritz the embossed background with Perfect Pearls.

Next up is a sketch from Freshly Made Sketches: http://freshlymadesketches.blogspot.com/2012/04/freshly-made-sketches-31-sketch-by-rita.html

This sketch was also easy to use. If you go to the link you can see what the Clean Team's awesome cards they designed with this sketch.
This is what I came up with:
For some reason it looks better in person. It's a pretty grey day today. I was going to put the star on straight then decided to tilt it a bit to add interest. The glitter heart is made from foam and the sentiment is embossed with white embossing powder.
 
 After I took the picture of my card I decided it looked a bit plain so I added the three clear gemstones at the top left corner. the star border is more of Michael's Craft tape.
 Wishing you all a wonderful weekend since this is my last post till next week.
 

Wednesday, April 18, 2012

Celebrate Freedom

For todays card I used a sketch from CPS #261:
Here is the link if you would like to play along:  http://cardpositioningsystems.blogspot.com/2012/04/cps-261-part-1.html    
Here is what I created with the sketch:
 All the pattern paper and cardstock is from Creative Memories.  The Celebrate Freedom stamp is a dollar stamp that I inked with Watermark VersaMark ink and embossed with white embossing powder an the  blue pattern paper.
I used Trapped Resist technique on the stamped image. I had a scrap of white cardstock leftover that had been stamped with script in brown ink so I stamped my image with the Watermark VersaMark ink right over the brown script and then  embossed it with clear embossing powder. Next I inked the image with Weathered Wood distress ink then die cut and embossed with Spellbinders die and my Cuttlebug. I added gold pearls to the die cut image and I decided the image was not large enough so I added a red mat behind it.
The navy background was also embossed with an embossing folder. I used the Craft Tape at the top of the background cardstock.

Up next is my second card which I used another wonderful sketch from The Deconstructed Sketch #47:
This was a really fun and easy sketch to work with. Here is the link http://deconstructingjen.com/archives/5804  Check it out a play along!
Here is what I came up with: 

 Again I used the navy blue cardstock and embossed it with stars. I then spritzed it with the Perfect Pearls. I cut it into three equal rectangles and adhered them to an embossed white cardstock and I wrapped a ribbon around the bottom of the card. I thought the ribbon looked bare so I added the three clear gemstones.
I used white cardstock for the sentiment and stamped it in Fired Brick Distress ink. I used red striped Craft Tape along the bottom edge. 
For the star I found a another scrap of white cardstock that had been stamped with the Hero Arts envelope stamp. I took that and stamped over it with the star image in Fired Brick Distress ink and cut it out. I then used a CM star punch and navy cardstock to make the star in the middle. After I punched the star I ran it through the Swiss Dot embossing folder and I spritzed it with Perfect Pearls before adhering it to the middle of the larger star.
Hope everyone is having a wonderful week.

Tuesday, April 17, 2012

A Card With A View

A new challenge is up at A Blog Named Hero! The challenge is called A Card With A View. All you have to do is create a card with a window. Check it out for yourself by using this link: http://ablognamedhero.blogspot.com/2012/04/challenge-2-cards-with-view.html  
Hereis the challenge:
Here is what I came up with:
I started with my background which is simple navy blue cardstock that I embossed with an embossing folder then spritzed it with Perfect Pearls. I then used a circle die to cut my "window".  I stamped the flag image on the insdide of the card with VersaMark Ink and used Black Sparkel embossing powder.
I had stopped at Michael's yesterday and bought some Michael's brand Washi tape. They call it Craft tape. It was on sale so I thought it was a good time to try it out. Also they had it in red, white and blue and I knew I was going to be making 4th of July cards for the troops. So I pulled the tape out and picked out the red & white striped tape. After I had put the tape on my card I realized the embossing showed through the tape. I should have put the tape on cardstock before I adhered it to my card. I also meant to put a red border around the opening of the window but forgot.
 Onto the sentiment. I used three stamps to make the sentiment. The one stamp with the stars actually  says 4th of July but I wanted I wanted it to say Happy 4th of July so I used the word happy from a Happy Birthday stamp by just inking Happy and I just inked the stars and "4th of " on the other stamp. I had a July stamp that was bigger so I combined it with the "4th of July"  and cut the white cardstock into a banner and inked the edges with Fired Brick Distress ink. I put gemstones under July and then adhered the word Happy with foam dots .
I decided to make another card the way I had intended to. Here it is with the red frame around the window:
 And also with a strip of white cardstock under the craft tape. It looks much better.
 On the back side of the window I adhered another frame so it would looked finished.
I also was able to add a red frame to the window on my first card and I like it a lot better too. Just couldn't change the craft tape.
Hope everyone is having a creative week.

Monday, April 16, 2012

Special Wishes

Two more cards to share today. First up is a birthday card and I stamped the envelope to match!

I used a sketch from MFT:

I found the green scalloped cs in my scraps and decided to start my card with it since it matched the sketch perfectly. Then I found some pp to match it.
I used the happy birthday Cuttlebug embossing folder to emboss the cs and pp together. I stamped the image on white cs with black ink.

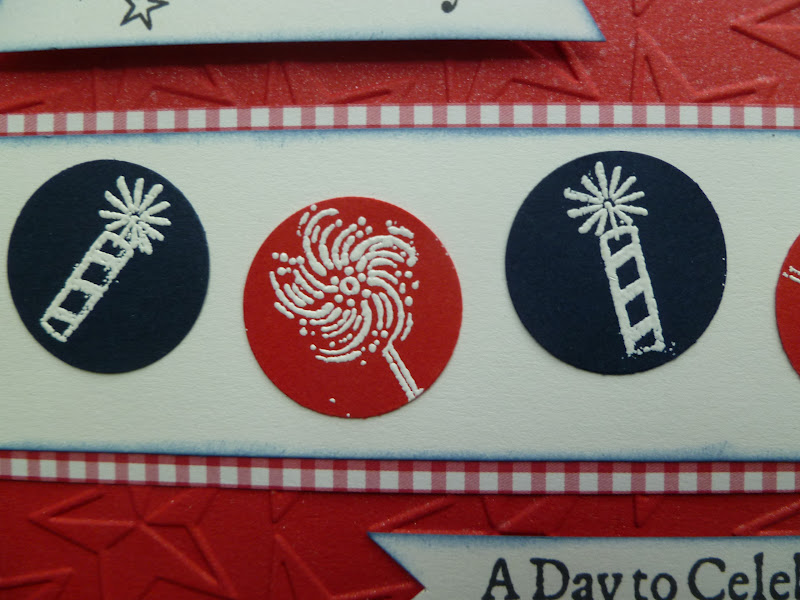
I wanted to do something else besides using watercolor pencils. I then remembered that I had bought some Glaze pens way back last Nov and hadn't used them yet. So I used them to color in the stars, flowers, cupcake liner, cherry and outlined the frosting with clear Glaze.
Maybe if you click on the pics to enlarge them you might be able to see the shine and just a tad of dimension. It's almost like embossing with a pen. So cool and easy to use. It really dries quick too.

For my second card I used a sketch from I Spy Sketch Challenge. Here is the link http://ispysketches.blogspot.com/2012/04/issc11-with-julia-stainton.html and here is the sketch:


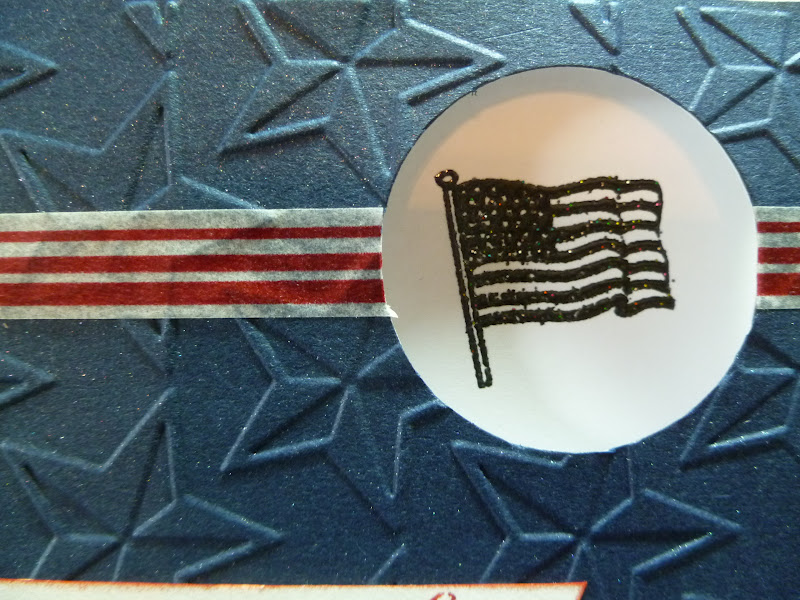
 I thought it would make a good 4th of July card and here is the card and envelop:
I have been seeing a lot of card makers using vellum lately so I decided to dig mine out and picked this embossed star vellum paper as the background for my image. I used dark red and blue pp under the vellum.
 I stamped the image onto white cs then die cut it with a Spellbinders die and embossed it and did the same with the blue mat. I again used the Glaze pens to color the image and put gold pearls in each corner of the blue mat.
 Here I tried to show the shine and dimension of the glaze. I like how you can see the detail of the black stitching even after it was colored over with the red glaze pen.

I at first was just going to use the scalloped red dot ribbon but it just didn't look right so I tried using the white ribbon but that didn't look good either. Then a light bulb went off I and I layered them together and that did the trick.
 
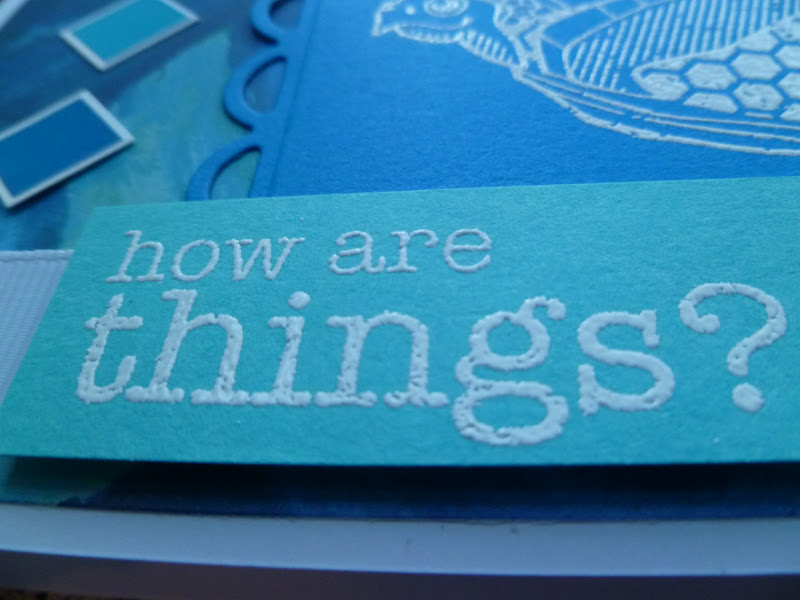
I stamped the sentiment onto white cs with black ink and trimmed it into a banner added a button threaded with gold thread.
 Thanks for dropping by and hope you had a great Monday.


Saturday, April 14, 2012

How Are Things?

 Good morning! Just here to share a couple of cards before I start the day. This first fun card was inspired by the Skipping Stones Design Sketch by Dina Kowal:
And here is my take on the sketch:
 While browsing through my stamps I came across this cute turtle image and sentiment and thought it would make a fun card paired with the sketch.
 I used white embossing powder for the image and sentiment . I like the way it really makes the turtle stand out against the blue.
The small blue squares are stickers and I backed them with white cardstock. The pattern paper, cardstock and stickers are all Creative Memories. I wish the photos had turned out better but I think it was just too much blue and not enough light to show the contrast. The colors are prettier than what the photos show.
 My second card was inspired by a sketch I found here: http://freshlymadesketches.blogspot.com/2012/04/freshly-made-sketches-30-sketch-by-tui.html
 
I am starting to make 4th of July cards for From Our Hearts. They send the cards overseas to our troops for them to send home to their family and friends to keep in touch. I thought this sketch would be great to start with.
So please tell me do you think the star looks funny with part of it chopped off? I can't decide if I like it or not.
Sooo many things happened while making this card and I had to go in a different direction. I wasn't planning on going with an aged and distressed look but when I ran the card through to emboss the background it cracked the paper and it has a white core. So I just went with it and sanded the whole thing.
Next I was inking the sentiment when I accidentally put a crease right in the middle. I didn't want to start over so I crunched the whole thing, flattened it back out and inked it some more.
 Then I realized the blue star borders where too bright so I inked them too with Vintage Photo distress ink and roughed up the edges. Problem solved. I also had to age the white star with Antique Linen and Vintage Photo.
I spritzed the star with Perfect Pearls to give it just a touch of glimmer. I ended up liking the distressed look just not sure about the star.
Have a great weekend and thanks for stopping by.

Friday, April 13, 2012

Just A Note

Sharing two cards today. First one is inspired from CPS #260:

This was a fun sketch to work with and if you would like to play along here is the link:

 Can you believe I didn't use any foam dots or gems. This card is pretty much just paper and one piece of rickrack.
 Of course it helps to have cute papers like this Sweet Glitter matstach from DCWV.
Second card of the day:
 For this card I used the sketch from this cute Sweet Sunday Sketch # 156 that was designed by Lynn Put:
And her is Lynn's card that the sketch came from:
I love the stitching around the card especially the stitching zigzag stitch at the top. Here is the link:http://kgiron.blogspot.com/2012/04/sweet-sunday-sketch-challenge-156.html

The stamps are just dollar stamps. I colored the tree with green and brown markers then stamped it on white Neenah paper. The die is Mat Stack 3 from PaperTrey Ink. The ribbon and tea dyed lace is from my stash.
The leaf glitter paper is from Matstack Animal Crackers from DCWV. You can see the glitter in the photo above.
The sun is out so I am going to get out there and soak up some vitamin D.
Have a great day.