Wednesday, September 14, 2011

Day 3 Dry Embossing

Day 3 Row two: I finished the second row of techniques today. This time dry embossing was the main technique.


The first butterfly looks like leather and the small butterfly has three layers. I love that I was able to use some leftover book pages that I had saved.  

On this butterfly I was again able to use up some plastic packaging that I had been saving but had no idea on what I was really going to use it on till today. I punched the butterfly shape then ran it through my cuttlebug in an embossing folder. It turned out gorgeous. I  made my flower different from Jennifer's. I first used a purchased white paper flower but didn't like the way it turned out and it was really a bit too big for the butterfly. So I found a smaller flower punch and punched out a flower from white cardstock embossed and inked it up with barn door distress ink. Then I misted it with perfect pearls and water mix.

 Next is the rosette. It is easy if you have the Tim Holtz die. After it was made I inked the edges. I like how Jennifer had us also ink the fold lines. I had never thought to do that and I really love the look. For the middle Jennifer used Sticky Back Canvas. I don't have Sticky Back Canvas so I just used regular canvas that I had leftover from making the kids something years ago. I ran it through my cuttlebug in an embossing folder and it worked great. Then I just applied distress ink with the blending tool and glued it on.
 For butterfly #4 I learned a neat trick from Jennifer. To easily center the small butterfly in the middle I did what Jennifer showed us. She used Eclips Masking tape but again it was something I didn't have but she also said sticky notes would work. I have tons of them so I punched the small butterfly from the sticky note and placed it exactly where I wanted it to be then lined up the punch with the sticky note and punched and had a perfectly punched butterfly.


For the last butterfly the Faux Letterpress Technique was used.I'm not going to lie I had problems with this one. I did it five or six times and always ended up with ink were it wasn't suppose to be. I didn't have the ink Jennifer used but I'm sure distress ink works too. So you can see bits of ink on the raised part. But I loved the Embossed Metal Technique. Again I didn't have Metal Foil Tape but Jennifer gave us several other products to use. I decided to use some old CM silver metallic paper. It worked great. I punched the silver paper with the butterfly punch and ran it through the cuttlebug in an embossing folder. It really came out looking great. 

 I am ready for the next row of techniques! I hope everyone else is having a fun time with the class too.


Tuesday, September 13, 2011

What's Happening in My Craft Room


My craft room is a disaster but I am so excited about what I am doing in there. I signed up for an online class called Inspiration Showcase with Jennifer McGuire and guests. Yesterday was the first day of the class. Here is what I have done so far:
 We learned five different ways of resist. Each butterfly represents  a different technique res.
 The red butterfly is one of my favorites so far.

 I really love how the green one turned out with kissing the stamps. I really don't have good stamps to do the kissing resist but it worked good enough to see how it works. I have had fun rummaging through my stash to to find stamps and inks to do each technique.
Jennifer also gave us some card samples with each technique. Here is my first card:

Jennifer has us using glossy paper. Now I have had some glossy paper sitting around for years but I never used it because it was always a pain to use. Not any more. This card was made with glossy paper and distress ink. I changed the card up a bit and I didn't have a border die so I found a CM punch, Love Struck and made a heart border instead of a butterfly border.

 Here is a close up of the border.
 I loved using paint as a resist. I think this was one of my favorite type of resist technique.

It is cloudy and raining out today it was a challenge to find a good place to take photos.
 This is the last card I made:
We were to stamp on pattern paper using resist. I really didn't have the right type of stamp but the pattern on the paper was tiny so it worked well enough.
 This is my favorite card of the three.
Looking forward to the second row of techniques tomorrow.

Thursday, September 8, 2011

Mini Chipboard Christmas Album

I just whipped this little gem up last night. I love how it turned out with such a vintage vibe thanks to the Making Memories pattern paper I used on  it.

 I decorated the front with a tag that I distressed with Vintage Photo distress ink, punched a scalloped border on the bottom and made a rosette flower with a gold pearl in the middle. Topped it all off with a gold bow. The album is held together with dark brown ribbon.
The first page has a pocket that holds two tags that have been inked and cream ribbons adorn each of the tags. The second page has a flap that where you can put photos and/journaling.

These are the middle pages. Both side have flaps that again are for photos and/or journaling. The stickers are from Creative Memories.


This is the inside of one of the flaps. This one has a pocket and  a journaling mat.

This is the last two pages. One has a flap with a pocket and the other side is a pocket.
This album is now in our etsy shop, Jenneresa.
I really had fun making this mini album and am thinking on making some more as kits to put in our etsy shop.
What theme do you think I should make up as kits besides the upcoming holidays?

Tuesday, September 6, 2011

Fall Is In The Air...

...so that means Halloween is not far off. I have been having a fun time with all of my Halloween stamps and papers for the last week or so and have decided to share some of my spooky creations .
First up are these tags made with vintage dictionary paper. These were really fun to make.


I really glitzed up the spider and web with Back Sparkle Embossing Powder and black gemstones on the web. The spider is punched out of black cardstock then I used black glitter on him. My favorite stamp is the crow or I guess it is probably a raven. It has a spooky elegance if there is such a thing.


 The haunted house is also a punch as is the ghost peeking out behind the house. I backed the house with yellow cardstock so it would through the windows and door.

So which tag is your favorite?

Here is the traditional witch flying accross the full moon. I love using the black sparkle embossing powder on the these stamps. I also used black distress ink on all the tags and the card.
On the moon I used Scattered Straw and Vintage Photo distress ink and I used Versa Mark to stamp Happy Halloween and clear embossing powder. The mat is white and  I inked it up with black soot distress ink.

Both the tags and card are in my Etsy shop, Jenneresa along with some new birthday cards. I will be adding more cards both here and my shop later this week.
Have a great week!

Monday, September 5, 2011

New Way to Make Meatloaf

I have some tips to share on how to bake meat loaf  in 45-50 min instead of 11/2 hours.

I was thumbing through one of my many recipe books and came across a recipe for Zucchini Meat Loaf. Now I wasn't interested in making meat loaf with zucchini but what did catch my eye was how they baked it and how short the bake time was.
The secret is in the shape. Instead of baking it in a loaf pan put it in a 9" deep pie plate. Bake for 35 min. Take it out and spread the topping on and return to oven and bake 10-15 min longer.
Here is the topping that I use:
1 tablespoon packed brown sugar
2 tablespoon ketchup
1/2 yellow mustard
While meat loaf is baking mix all topping ingredients in a small bowl.


To serve cut the meat loaf as you would a pie.


Another tip that I do with my meat loaf is to make it up in the morning, put it in the pie plate, cover with foil and put in the refrigerator until I'm ready to bake it. I do this if I know we are having a busy day but want a nice dinner. That way I just pop some baking potatoes and the meat loaf in the oven and we have a good dinner with little effort and not much to clean up.

I hope these tips help to get a nice hearty dinner for your family on busy days like it does for mine.  Enjoy!


Saturday, August 27, 2011

Sweet Little Cupcake

Today I thought I would share with you the other cupcake card I designed for our little cupcake store here in Silverdale. I had so much fun making these cards that I also made up four different designs of cupcake tags! I unfortunately didn't take photos of the tags before putting them in the shop. But if you live here you could certainly drop by the Bella Bella Cupcake shop and see them there. I just dare you not to eat a cupcake though. Their cupcakes are so pretty as well as tasty.

 
I am in love with the colors of the paper. Too bad it is an old CM paper pack and I don't have any left except for scraps.
I inked the edges of a white doily and layered it on top of a larger circle of light yellow  paper. I inked the edges of the paper with the same ink as the doily and stamped a border in the same distress ink.
For the sentiment I had already die cut a bunch of banners and stamped them with different sentiments. Lucky there was a birthday one so I just grabbed it an inked the edges with the distress ink and adhered it to the card.
The really fun part was making the cupcake. I paper pieced it by stamping the cupcake stamp on some pattern paper and cutting out just the cup part. Next I stamped it again on brown cardstock and embossed the ink to make the frosting swirls stand out more. I then misted just the frosting top with Pearl Mist to give it a nice shimmer. When I adhered the cupcake bottom I used a thin dimensional dot and on the frosting I used a thicker dimensional dot so it looked like the frosting was over the cup.
In the next few posts I should have some Halloween cards, tags and cupcake picks to share with you.
Till then I hope you all can enjoy the last bit of summer before the days start getting chilly. I have noticed how short the days are already. It's sad because we are just now enjoying our summer here. Sure hope it's a short winter this year.

Saturday, August 20, 2011

Tags Galore

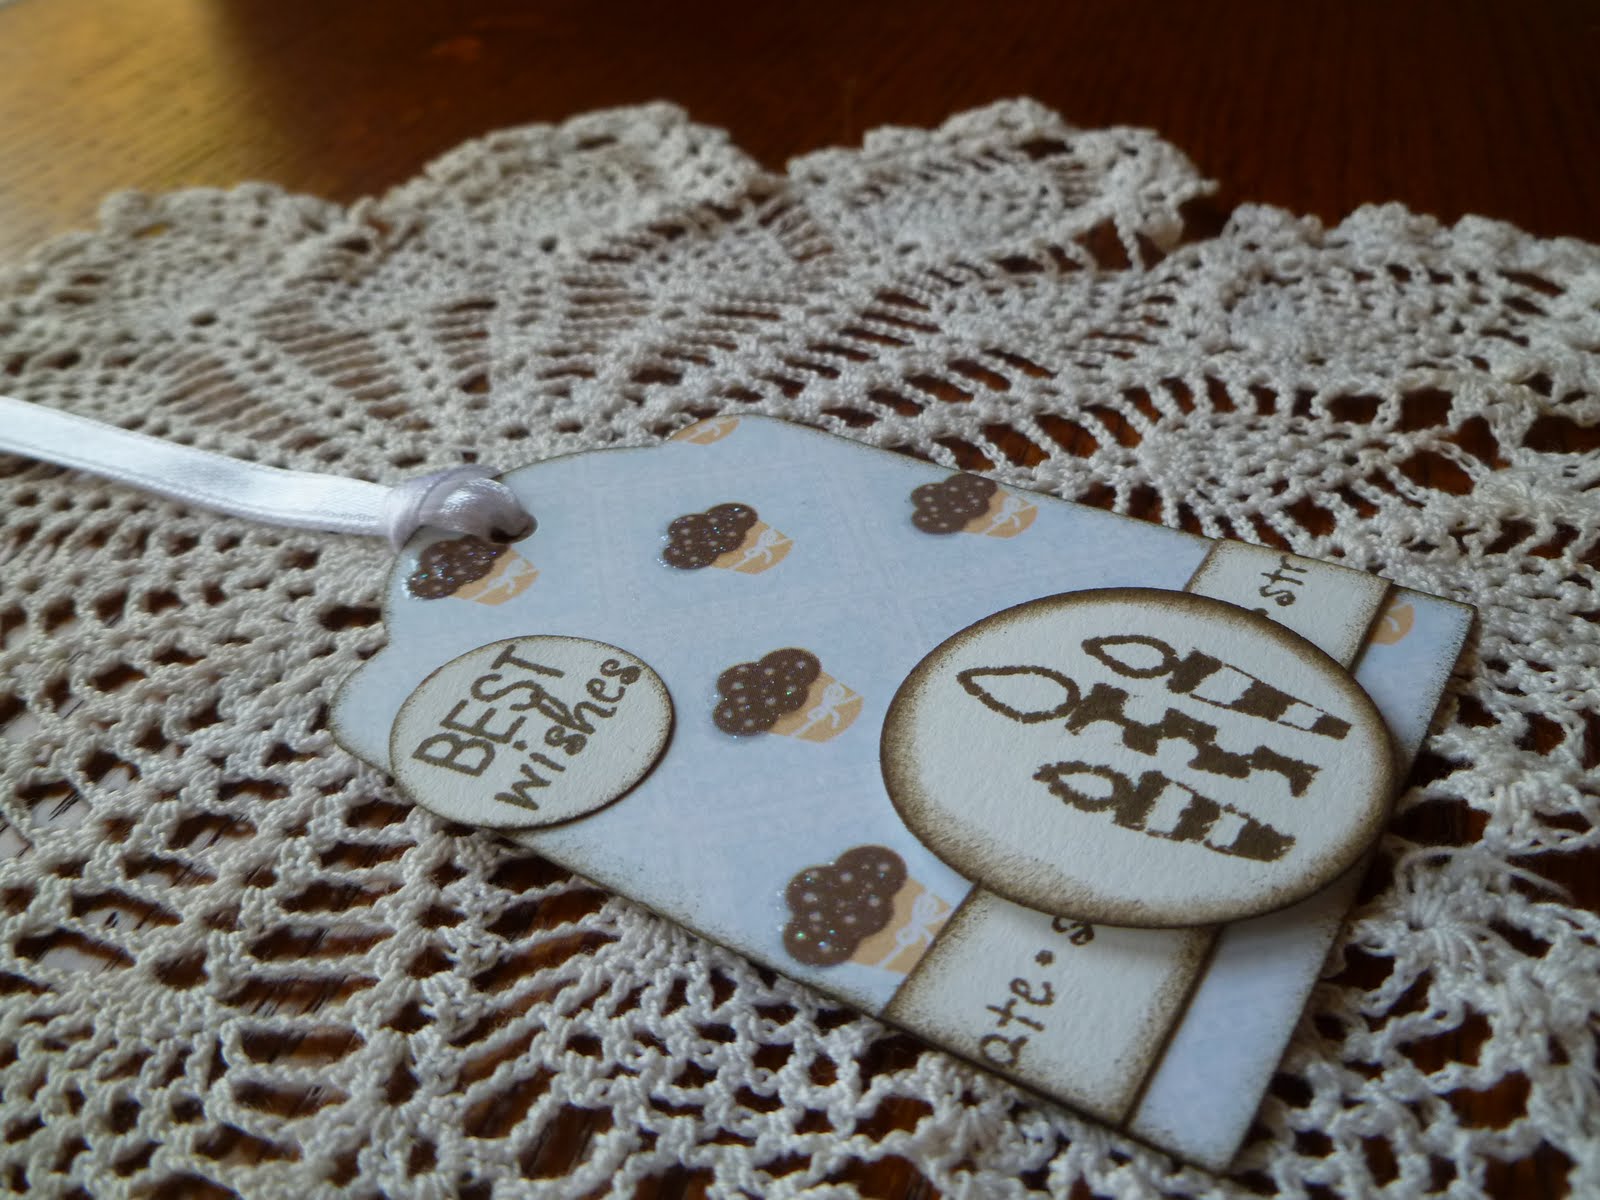
I was busy making tags last night and thought I would share them with you. They are all about yummy cupcakes.
This first one is paper from the DCWV The Sweet Matstack I stamped a strip of white cardstock with a border and stamped the candle image and best wishes all with Walnut Stain distress ink. I also inked all edges with the same distress ink.

 It is a simple but cute tag.
Next up is one of my favorites from the batch. This one I cut the tag out of the middle part of a doilie with the Creative Memories tag punch and backed it with a kraft tag for stability. I added a strip of pattern paper on the bottom and punched the cupcake with a Martha Stewart punch. The icing is dark brown cardstock that I covered in Glossy Accent and dropped in some white seed beads for sprinkles. I cut two ovals one out of paper and the other from the doilie to make a plate for the cupcake to sit on to ground it. I punched a small tag and stamped it with stamps from Papertry Ink and adhered it with pop up dots. I also used pop up dots on the icing to give the cupcake some dimension.


Here is a better look at the icing. I had so much fun making these cupcakes.
 The ribbon is wired ribbon that I picked up at Michael's in the $ section. I also made another one tag using the same paper but I forgot to take a photo of it. The only difference is instead of the small tag I stamped You're so Sweet on a strip of the soft yellow paper.

This next one is my second favorite. I just bought this DCWV Nana's Kitchen Matstack yesterday to use in the recipe book I'm going to make for my daughter now that she is away at college. But I just had to make some tags with this paper it is sooo cute!


Again I used some leftover doilie pieces for the bottom and added a strip of pattern paper to the bottom of the tag. Next I stamped a border on the strip. I stamped the circle and for you and cupcake all with Walnut Stain Distress ink. I adhered the cupcake after cutting it out with pop up dots onto the middle of the pattern paper strip and. It's too bad the camera didn't pick up all the glitter on the DCWV paper. It is so much prettier in real life.

Tuesday, August 16, 2011

25th Anniversary Card

I thought I would share with you the card I made for my husband for our 25th anniversary.
It came together rather quickly as I knew I would be using our wedding colors, blue and yellow and that I wanted to cut one of the wallet photos that we had left over into a heart shape which I then matted with a blue heart.
 I also knew that I wanted to use the number dies from Papertrey Ink in silver for the 25th.


 I added a white heart border punch and layered a yellow and a blue ribbon over it. The card seemed a little bare so I pulled out some paper flowers and arranged them around the bottom of the heart and added pearls to the center of two of the flowers.


After adding the Happy Anniversary with pop dots it was complete.

And we had a lovely anniversary. We renewed our vows at church and had a barbeque at our house that our kids put on for us. Earlier this year we had bought some Korbel Champagne when we were in Sonoma Valley and decided this would be the perfect time to break it out and share it with our friends.
It is amazing how fast 25 years went by. Looking forward to the next 25.

Monday, August 1, 2011

Lavender Fields of Blue

This birthday card was for my aunt who has loved the color blue for as long as I can remember. It is always easy to decide on the color for her card. BLUE.
Sorry the photos are not very good. I had to make it and send it quick and the lighting was not very good when I took the photos nor was the location but it is better then not getting a picture of it at all.


I used dimensional stickers which was a tag as the focal point of the card. I matted the tag on a scalloped oval and inked the edges of the mat. I used pop up dots to adhere the matted sticker onto the card.

I used the Swiss Dot embossing folder on the yellow cardstock and punched a scalloped border with blue cardstock wrapping yellow twill ribbon and layering a black ribbon with white dots over the twill and knotting it on the right side of the card.
 I threaded a yellow button with white floss and added it to the tag.

I used a dimensional sticker for the sentiment on the inside of the card and matted it on a scalloped oval with the edges inked in black. 

I stamped the sentiment happy birthday on the sticker with black ink.

These stickers were some of the ones I bought at Michaels in their $ section. I have made up ten other cards using the same types of stickers and I love how they all turned out. I am really having fun making cards with them.