Showing posts with label Mojo Monday. Show all posts

Saturday, June 14, 2014

Enjoy The Journey

I have a card to share with you that I made for some dear friends of ours that will be heading to Germany at the end of the month for three years. We will miss them a lot but are so excited for them at the same time.
 
Here is the card:
I used the sketch from Mojo Monday:
I made a few changes to the sketch. I used only two brads instead of three because I only had one red and one blue and I used the arrow for the banner and the last difference was I didn't use diagonal strips. Instead I stamped it along the bottom edge.  
 
I did a bit of distressing and inking of the edges to give the card a vintage feel.

I love the sweet little airplane that was punched out of silver metallic paper for the final embellishment. The arrow is stamped on pattern paper then I cut it out.
 
 I don't know about you but I find myself buying stamps now that have matching dies so I don't have to do any fussy cutting. It sure saves a lot of time.
 
Thanks for taking a peek. Hope your having a grand weekend!
 
Teresa

Friday, August 23, 2013

I Love You

Oops where did the sun go? It has been hiding behind some clouds this morning but is now trying to make an appearance.
I have a card today that I used three different challenges for it's inspiration.
First off here is the card:

This card makes me happy for so many reasons:
1) It's so not my style and I was flying by the seat of my pants and really had no plan for it other than the sketch and colors but I am very pleased with the outcome.
2) I finally was able to use bubble wrap! I love the look of bubble wrap but never had the right project to use it on. So I can write that off my creative bucket list. (does anyone else out there have a Creative Bucket List?)
3) It has lots of texture. I love texture and using my embossing folders. I even used a couple that had never been used which is something that always makes me happy, happy, happy!
4) And lastly I finally used  a stamp from the Inkadinkadoo set "An Affair From The Heart". I really don't know what possessed me to purchase it in the first place so many years ago 'cause it really isn't my style of stamps although they are pretty cool. Maybe for teens but not for me.
Here is sketch #307 from Mojo Monday that I used:
They always have such neat sketches and I love using them.
This is my first time playing over at A Mixed Media Color Challenge! They are new and this is only their 6th challenge. The DT has some really beautiful and inspiring work. So please drop by and give it a whirl! You'll be glad you did.
The colors for this challenge are light and bright pink and gray as your main colors. "Also this is a MIXED MEDIA color challenge therefore we would like for you to COMBINE at least TWO types of MEDIUMS (ie: paints, markers, pastes, mists, inks, etc...), in addition to the "traditional" stamped / colored image to create your project." I used distress inks and gelatos and maybe the bubble wrap counts too. :)
And for my third challenge I'm entering this in the Lawnscaping Challenge #64
For this challenge all you have to do is use any distress product or technique of your choice. Which I used distress inks which are my favorite type of inks to use.
Now a little more about the card:
 
 This is the image I used from the "An Affair From the Heart" stamp set. It's stamped on white CS with Dove Gray Memento Ink. A Spellbinder's die was used to die cut it and emboss. Finally the edges are inked in Pumice Stone distress ink.
Actually the first thing I did was to stamp the white card base with the bubble wrap. I don't know how others do it but I just swiped the Picked Raspberry distress ink pad directly on the bubble wrap then turned it over and layed it on the CS and gently pressed on it. Love, love the look!
Next I made the two triangles for the corners with light gray CS and layered the gray with light pink CS and ran layered triangles through the Cuttlebug with an embossing folder. Next I used the inking tool and Picked Raspberry DI to highlight the raised parts of the embossing and adhered the finished triangles to the card base. The banners were made from white CS and ran through the Cuttlebug in three different embossing folders. Then I used a gray and pink gelatos to add color to the banners and a bit of water . I find that if you are using regular CS instead of watercolor paper it is best just to spray some water on your mat and dip your finger in the droplets and blend the gelatos instead of directly spaying your CS with water. The CS tends to get too wet that way.

 The sentiment is from The Stamps of Life, Banners 4 All stamp set. I had wiped some of the gray Gelato on a scrap piece white CS to test it so I just used to stamp the sentiment on and punched it out with a CM circle punch, layered it on a light pink piece of CS that had been stamped with the Envelope HA stamp in Picked Raspberry and ran through the Cuttlebug with a Spellbinder's die. The edges are also inked with the Pumice Stone. I added a dark pink gem to the o in the word You.
And lastly I thought the top right corner of the focal image needed something so I got out my Tim Holtz Idea-ology  Gears and instead of using a brad in the center I used dark pink gems to match the one I used in the sentiment. I then inked the edges of the card to frame it and pull it altogether.

I think I will be sending this card to my daughter. This summer she had two summer classes and was working two jobs and moved right before finals so she was pretty stressed out. Thought it would be nice to let her know we love her and our proud of her.

Sorry this post turned out to be so long. Thanks for sticking with me to the end. :)

Have a great weekend!

Teresa


Thursday, August 15, 2013

Mojo Monday Feel Better Soon

Hello my blog friends! I finally have something crafty to share after a week of camping. I still haven't gotten around to sharing about our trip but I hope to get it posted by the end of this week.
Last night I sat down in my craft room with the Mojo Monday Sketch #306 and the inspirational photo and colors from ColourQ #202 and I came up with this very bright and cheery get well card:
See what I mean by bright! 
I love this sketch!
 What a gorgeous pillow! 
I pulled out my Marvy scalloped punch which to tell the truth I have not used much since I got my Cuttlebug and scalloped dies. So it was fun using it again.
 I poked a hole in each scallop and inked the edges with Pumice Stone distress ink then used Creative Memories Cutting system to cut out the gray circle which I distressed the edges. I then stamped the circle frame with VersaMark Watermark ink and white embossing powder. I cut the middle out and backed it with a light yellow cardstock and stamped the sentiment in Cranberry from ColorBox and embossed it with clear embossing powder. I did make a small change from the sketch. I didn't use the rectangle that was suppose to be behind the small circle. I couldn't  use it since my small circle was the cut out from the middle of the larger circle.
I used my favorite ruffled yellow ribbon around the top of pattern cardstock and layered a red fishtail banner on top and then used a chipboard flower and leaf. I painted it with acrylic paints and added Glossy Accents. I love how shiny it makes things. After I added the flower it really pulled everything together. But I wasn't happy with it yet. It seemed to be missing something. I knew I should have pulled out my trusty Cuttlebug and Swiss Dot embossing folder to emboss the gray background but (gasp) I forgot! So now what was I suppose to do now! :o
 After rummaging through some bling I came across some pearls and put three in both of the top corners. My card now looked finished.
Nothing makes a card come together quicker than using a sketch and color challenge together.  Try it sometime if you haven't yet and let me know how it worked for you.
Now I need to get back to my house work! At least the laundry is done and I got groceries this morning so I am getting there.
Have a great day!

Teresa


Thursday, July 11, 2013

Wild Thing

Good morning!
I'm here to share with you all a fun anniversary card I made for my husband:
I just love all their sketches over there at Mojo Monday! Julee does a fabulous job of coming up with great sketches every week. So thank you, Julee!
Now this is my second try at this card. the first card is the same except after mulling it over in my mind I decided I hated the look of the focal image. It just did not seem to match with the fun papers so I ripped it off the card and started over. It took me the second time to get it the way I wanted but I am much happier with it now.
Here is what the first one looked like:
I had use white cardstock for the background and inked the leaves in Peeled Paint and Mowed Lawn distress inks. Then I inked the over it with Crushed Olive and Peeled Paint. Then for the cheetah I stamped the body in Scattered Straw then stamped the spots and facial features in Tuxedo Black on white cardstock. I didn't like the stark white around the cheetah so I inked the edges with Scattered Straw. The grass border is white cardstock inked with Crushed Olive and Mowed Lawn. After I put it on the card it looked out of place with fun papers. I think it was too artsy if you know what I mean. So after looking at it all evening the next day I started all over.
Here is my second try:
I am much happier with this. Not so artsy with all the ink and I did the cheetah on light yellow cardstock instead of white, stamped the leaves on light green cardstock and didn't stamp the them so close together.The grass border is the same light green cardstock as the circle. I also used a plain round circle on it and inked the edges of the larger circle with  Scattered Straw. I love it so much better. It is harder to tell the difference by the photos compared to real life but there is a big difference between the two.
I adhered the sentiment strip right onto the bottom edge of the circle . I added the heart shape over the word "heart" then added pop up dots to adhere the whole thing to card. I added the pen stitching with a red Glaze pen which adds a bit of shine and dimension.
I stamped happy anniversary in the upper left corner in Tuxedo Black ink and is from Papertrey Inks Mega Messages. The other sentiment and cheetah image are also Papertrey Ink stamps from It's a Jungle Out There. The leaf is an old stamp from Rubber Stampede.
Thanks for the visit and have a great day!
Teresa


Friday, July 5, 2013

Horse'n Around

Happy Friday! I'm sure many here in the US are enjoying a long weekend since the 4th was yesterday so I hope you are having a wonderful time.
I have been working on this card that I'm sharing today for three days and finally finished it yesterday morning! I had a crazy idea to use my horse stamp to go with the Mojo Monday sketch even though most  went with flowers and ribbon. It is for my sister's birthday and she, like myself loves horses.
My sister isn't a girly girl but I still wanted it to be a little on the feminine side and is where the problem was. I seriously was wondering whether it was going to work or not until I found the right pattern paper.
Here is my card:
Here is the lovely Mojo Monday Sketch Challenge #300
They are celebrating their 300th challenge over at Mojo Monday so if you have time you should check out what all is going on over there. Fun times for sure!
I am also entering this card for the current challenge, Playing Favorites over at A Blog Named Hero.
It's pretty simple just use your favorite HA stamp or product on a new card or project. I used a favorite stamp from HA, which was this horse stamp:
It is old but I had just pulled it out last month and have been using it again. I really do enjoy taking something that I haven't used in forever and make it new again by applying new papers and techniques which make me fall in love with it again.
Here is the other birthday card I made with the same stamp if you would like to see it. It's funny because I also used a Mojo Monday sketch to create it too.
 I didn't want to go with brown for the barn shutter so instead I stamped the stalls Barn Door and used clear embossing ink before inking them with worn lipstick. I then inked the outside with Walnut Stain to tone down the red.
The horse is stamped with Timber Brown Memento ink and clear embossing powder. I then used Antique Linen distress ink & Vintage brown which I stamped on my craft mat and spritzed each color with water before coloring the horse image.
 There was a hook that was where the brad is holding the rope. I cut it off and used the brad instead. The dark brown banner or flag, whichever way you prefer to call it, was dry embossed using wood grain embossing folder. I fussy cut the rope and stamped the image onto white cardstock using Walnut Stain Distress ink.
 I stamped "For my- sister" on the background paper with Timber Brown Memento Ink.I used a brad for the dot on the i in Sister. I decided to add a couple of wraps of jute at the top of the banner to help balance out the card.
I added 3 brads in the upper left corner and did pen stitching around the entire card. I decided the background was too plain so I grabbed my cuttlebug and my brand new never before used  Chicken Wire embossing folder.
Look at all that detail. The dry embossing really added a lot to the card.
Well, that's it for this post. Not sure that I'm thrilled with the way this card turned out but it's done.
Have a good day!

Teresa


Wednesday, June 19, 2013

With Sympathy

 Hello and happy Hump Day!
I unfortunately had to use a sympathy card last week and it was the only one in my stash so I thought to myself I need to replace it because you just never know when you will need one.
So here is the card I made:
Here is the sketch I used from Mojo Monday Sketch#298
For the focal image I used Hero Arts clear stamps and stamped the floral image with Versamark Watermark ink then embossed with white embossing powder on sticky back canvas. The sentiment is stamped with Tuxedo black Memento ink. I then backed the canvas with black cardstock and ran it through the Cuttlebug in the Swiss Dot embossing folder and adhered it to the card with pop up dots.
 The ribbon is Papertrey Ink and I thought it looked a little bare so added the leaves. Not sure it that was the right thing to do but its done.
 The black scalloped strip is a scrap and I liked it because it is lined and looked better than a plain black strip. The banners or flags (some people call them flags, I call them banners) were cut with Papertrey Ink dies. This is the first time I have used the dies ( I have the matching stamp set which I used on the scarpbook page here). I love how they come in two sizes so I could back the smaller banners with black cardstock.
Well that's it for today's card! 
Have a wonderful evening.

Teresa

Thursday, June 13, 2013

Sailboat and Flourish Tree

Hello! 
A friend called on me to make a few cards for her this weekend and I am done. The first card is one of two Father's Day cards she needed and has a nautical theme which really seems popular right now.
I realized that I really need some nautical themed pattern paper but I was able to make do with what I had on hand. I used this Mojo Monday Sketch
These colors were challenging for sure but it is fun to try out new color schemes and break out from the same old ones I use over and over.

For my focal image I used a little boat stamp from Hero Arts and paired it with a wave stamp from Raindrops on Roses (I don't think they are in business any longer) and I encircled it with an image from my new Verve stamp set "Strong Anchor" inked in Tumbled Glass distress ink. Fired Brick was used for the boat and Ocean Depth chalk ink for the waves.
I used a couple of embossing folders to add texture to the cardstock and added baker's twine from The Twinery along the scalloped edges.The twine seem to blend the edges together. Sometimes I just don't like seams to show and the twine was narrow enough and was another way to add more of the indigo blue color.
 I had to move the sentiment banner to the top instead of below the focal image as in the sketch. It just wouldn't work underneath. I stamped the sentiment, which is from Verve, in Ocean Depth and inked the edges too.
 Here is the inside of the card using leftover scraps off of paper I had to trim down and the ships wheel that I had wanted to go on the front but it didn't work out so I used it inside the card.
 Here is the next card:

 I used this sketch from Retro Sketches

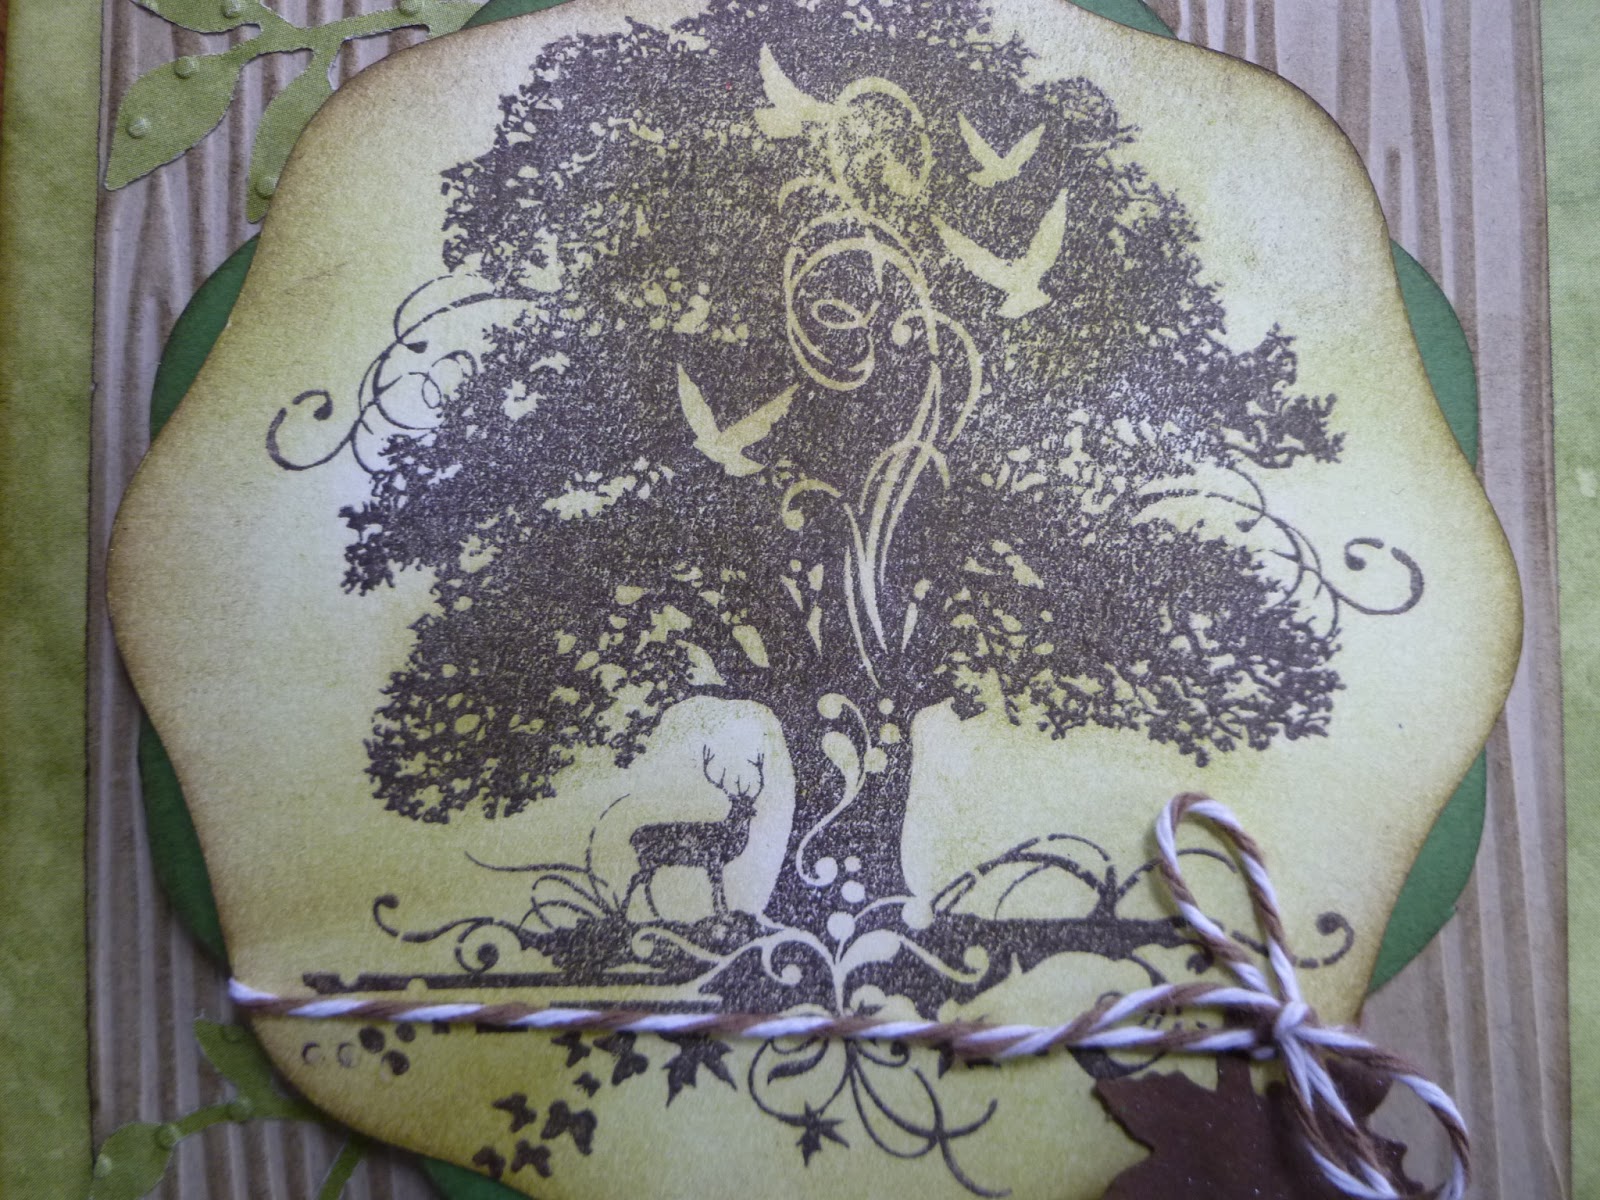
 For the focal image I used this lovely tree image with the dear that I already had in my scrap box all ready to go and I even had the green mat to go with it. So this card came together rather quickly. 
The only thing I had to do to the focal image was ink it with Peeled Paint distress ink and then inked the edges with Walnut Stain.
 I just added the twine from The Twinery around the bottom and glued a maple leaf that I spritzed with Perfect Pearls. The sentiment is the same as on the first card just stamped on kraft CS in Walnut Stain distress ink.
 This photo shows the dimension and the texture from the embossing folders I used on the kraft CS and the leaves. I also inked the kraft CS with Walnut Stain and also the edges of all the papers.
Instead of using the banner in the sketch I thought it would be fun to switch it for leaf branches.
I am also entering both cards in The Twinery's Anything Goes... Twine Madness Challenge and in the  Hero Arts #25 It's a Man's Man's World Challenge.
My, there are a lot of fun challenges out there! So go ahead and check these challenges out. There is still plenty of time to play along if you want to.
If you know of other fun challenges please share them in a comment here. It is always fun to try new challenges.